This tutorial will show the setup of a LoRaWAN network, including configurations on gateway/end nodes and data workflow with scripts.
0. Prerequisites
Hardware:
- Gateway: RAK831 Pilot / RAK7243
- End node: NUCLEO-L476RG + SX1276MB1MAS
Software:
1. Gateway
1. Write the RAK7243 firmware image in gateway, see how to write here.
2. Config the gateway with the build-in ChirpStack, see Quickstart.
Note:
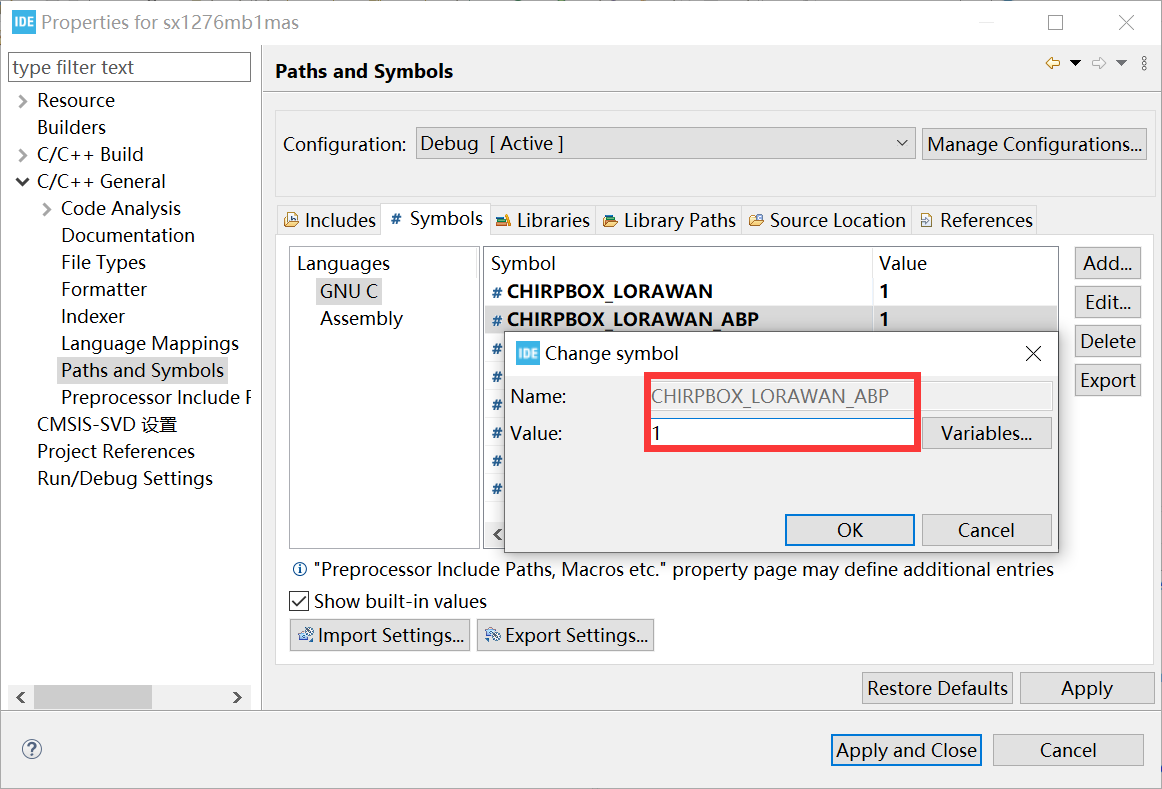
The default mode for nodes joining LoRaWAN is OTAA. If nodes want to join with ABP mode, configuration of node should be modified as following:
Project configuration:
- Define the marco
CHIRPBOX_LORAWAN_ABPin the STM32Cube project:
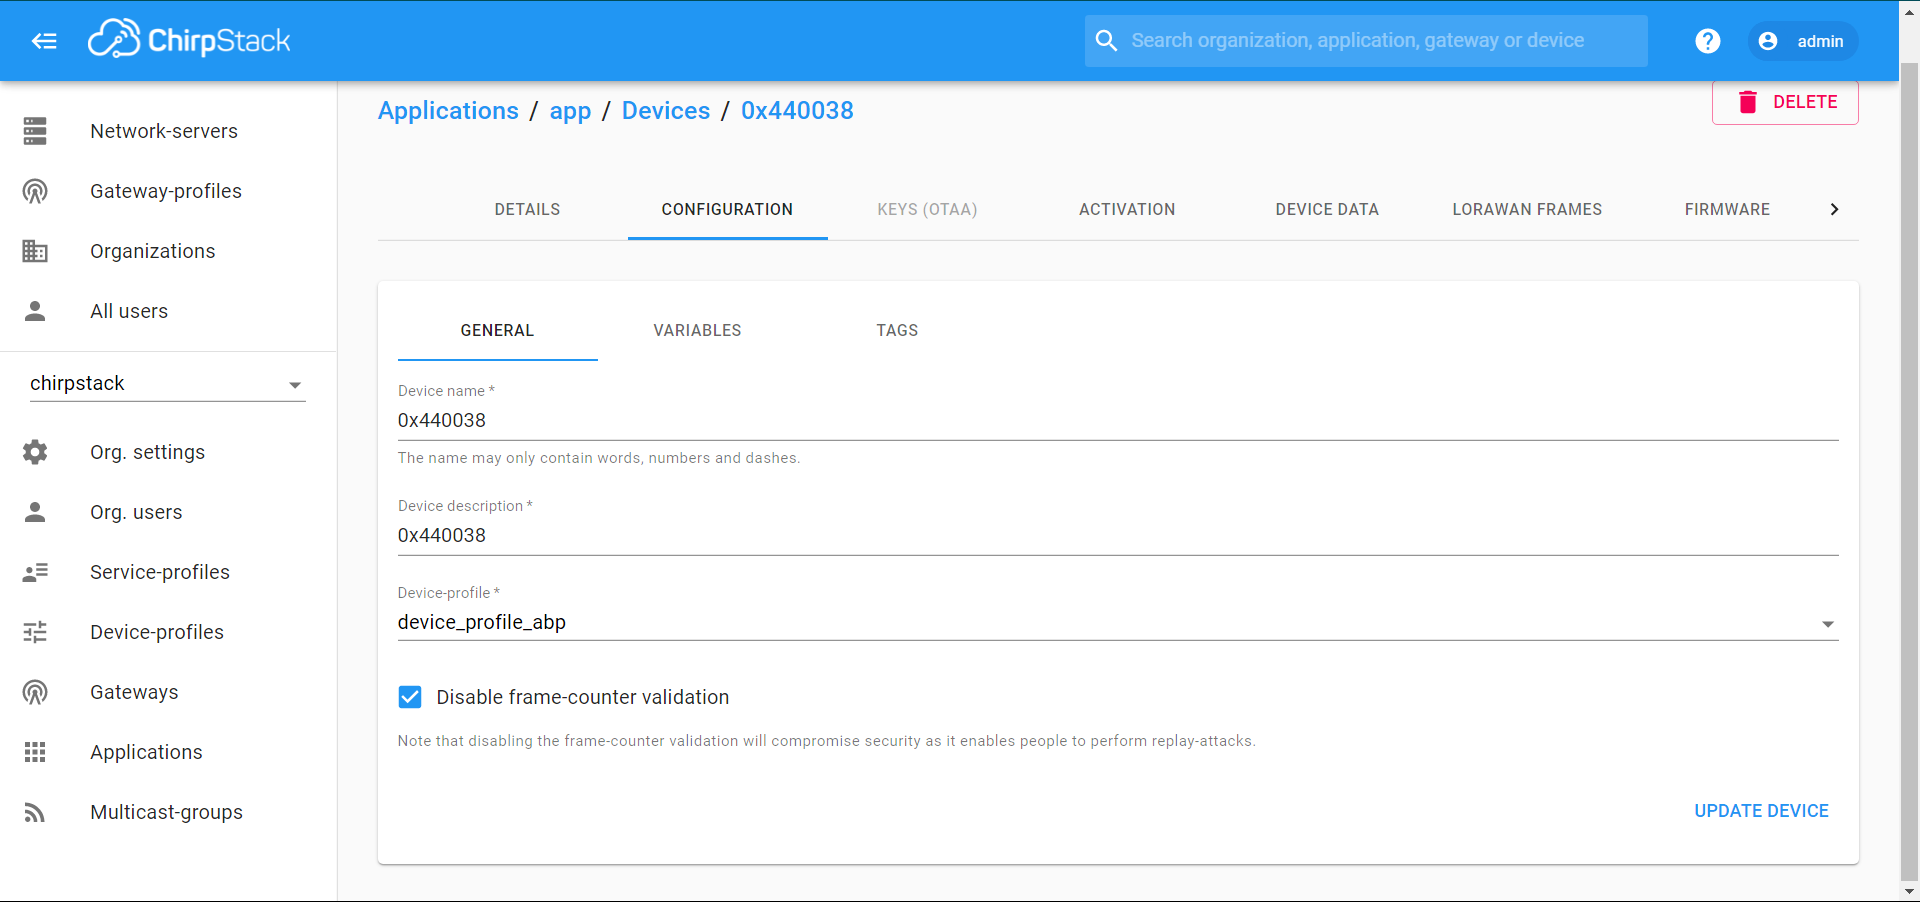
Chirpstack configuration:
- Device profile set with
device_profile_abpand clickdisable frame-counter validation.
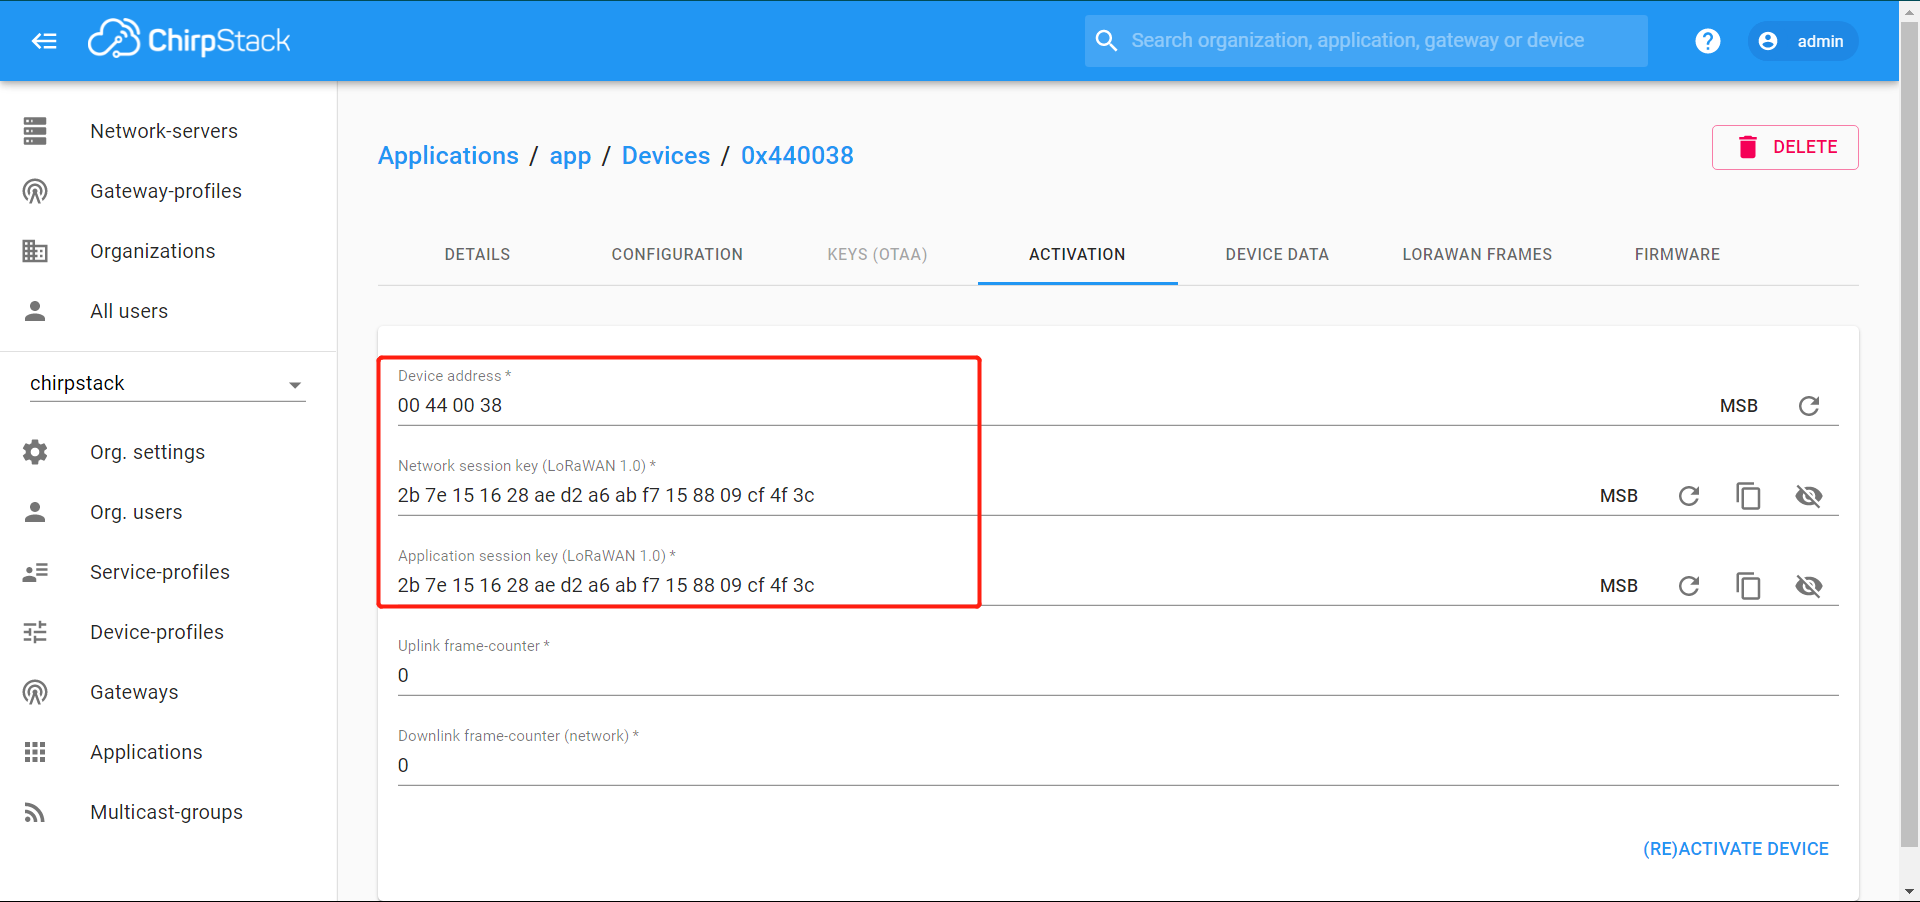
- Device address, network session and application session key should consist with the firmware.
- Login to gateway and open chirpstack-network-server configuration:
1 | pi@rak-gateway:~ $ sudo nano ../../etc/chirpstack-network-server/chirpstack-network-server.toml |
- Change
disable_mac_commands=falsetodisable_mac_commands=true, save and reboot the gateway.
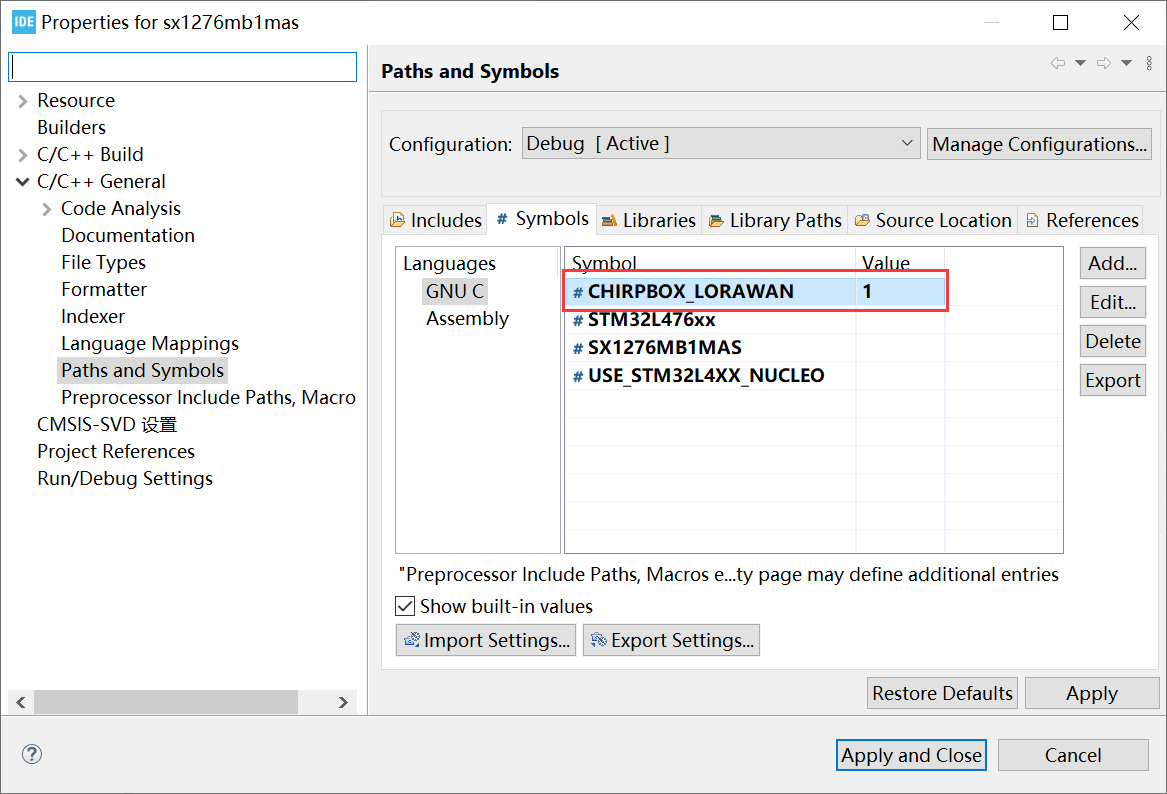
2. End node
The example project is based on I-CUBE-LRWAN, where modifications in this project are within the define-marco CHIRPBOX_LORAWAN.
3. Data forwarding
3.1 MQTT to MySQL Database
The MQTT integration can publish data from gateway bridge and application server in JSON format. In this tutorial, we store those retrieved data in MYSQL server.
3.1.1 Configuration
1. MQTT settings
- Login to gateway and open chirpstack-gateway-bridge configuration:
1 | pi@rak-gateway:~ $ sudo nano ../../etc/chirpstack-gateway-bridge/chirpstack-gateway-bridge.toml |
Change
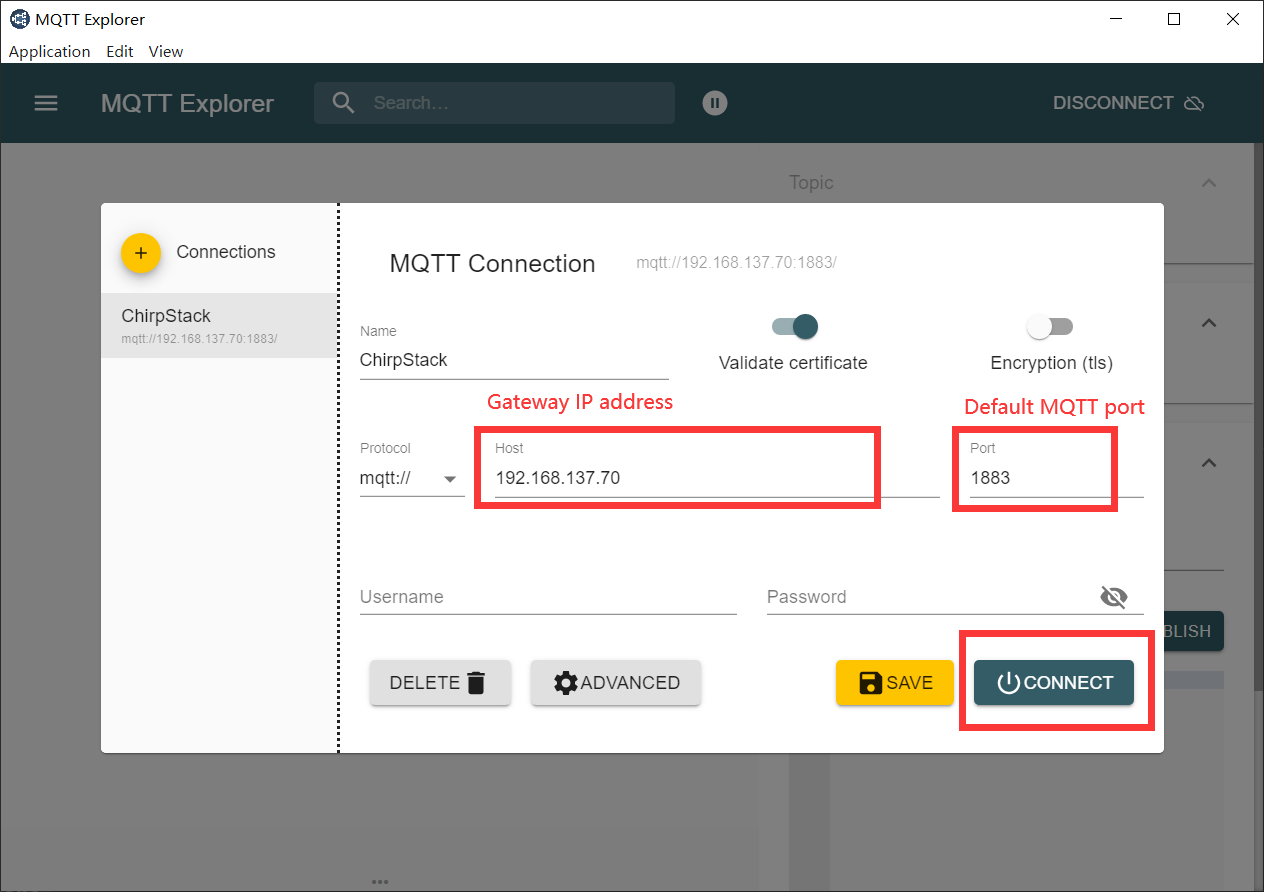
marshaler="protobuf"tomarshaler="json", save and reboot the gateway.Use the MQTT Explorer to check if we can receive data through MQTT
- Login with the gateway host address and MQTT port
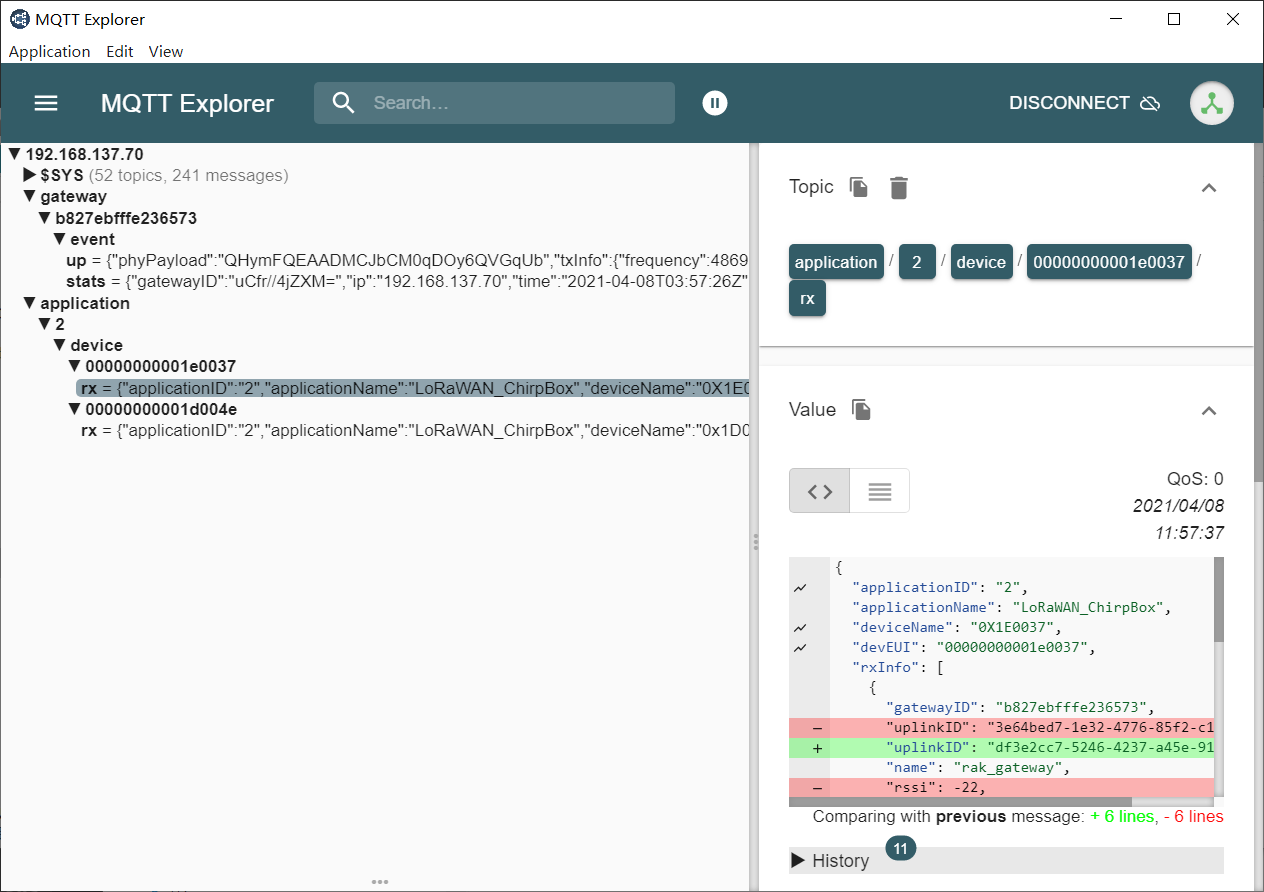
- See live events from gateway
2. MYSQL settings
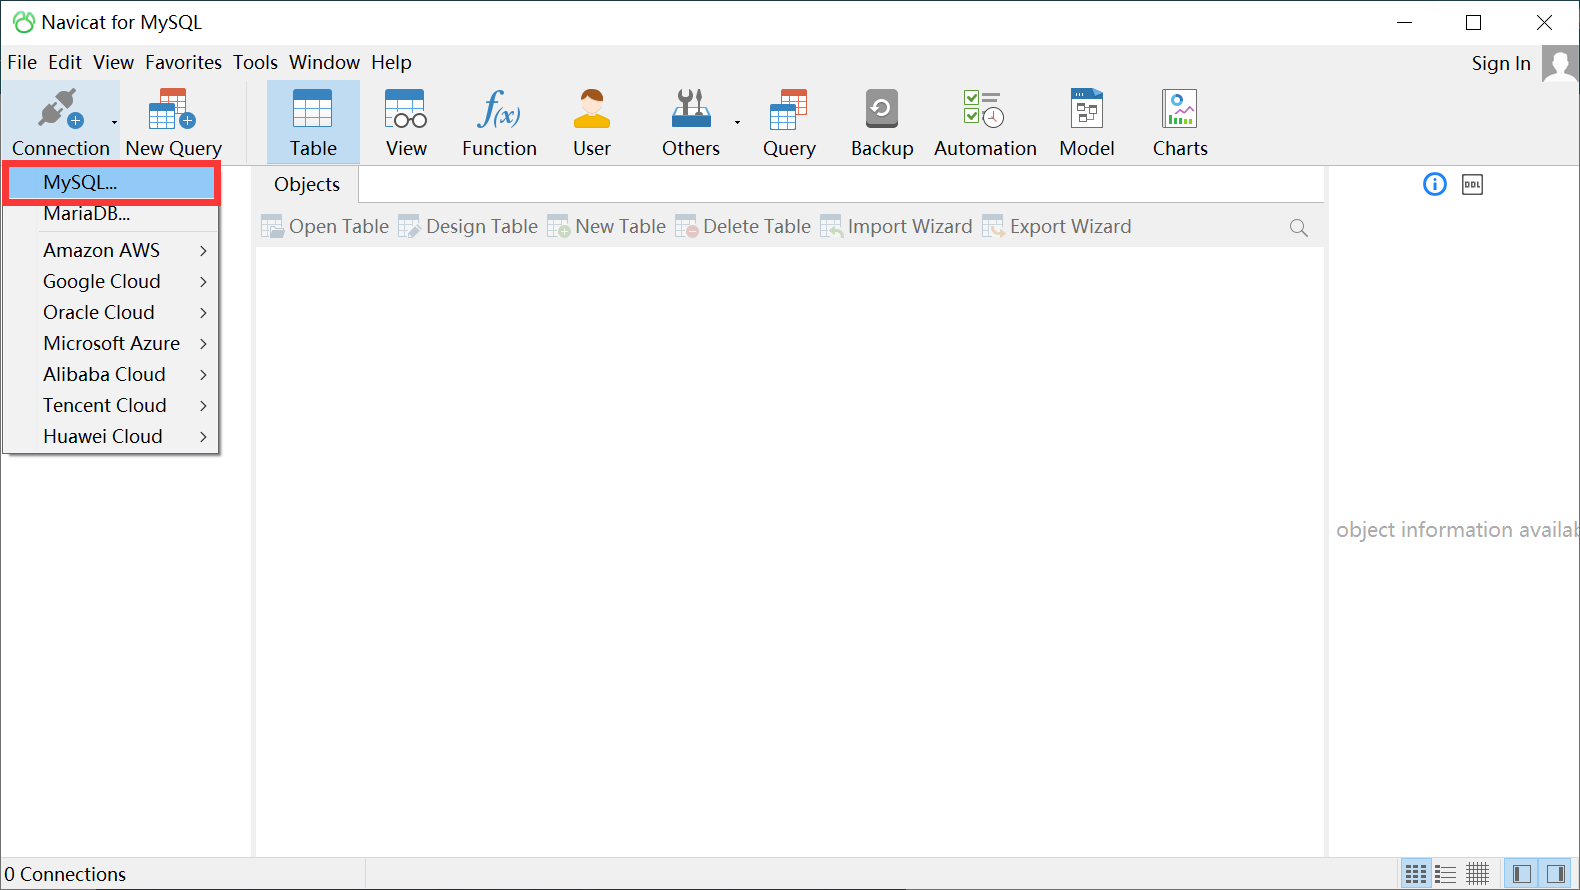
- Install MYSQL and MYSQL GUI tool Navicat on Windows.
- After installation, start MYSQL service in command line with your MYSQL name, for example
MYSQLTEST:
1 | net start mysqltest |
- Create a new user
lorawanwith password1111, and grant privileges in MYSQL command line client:
1 | CREATE USER 'lorawan'@'%' IDENTIFIED BY '1111'; |
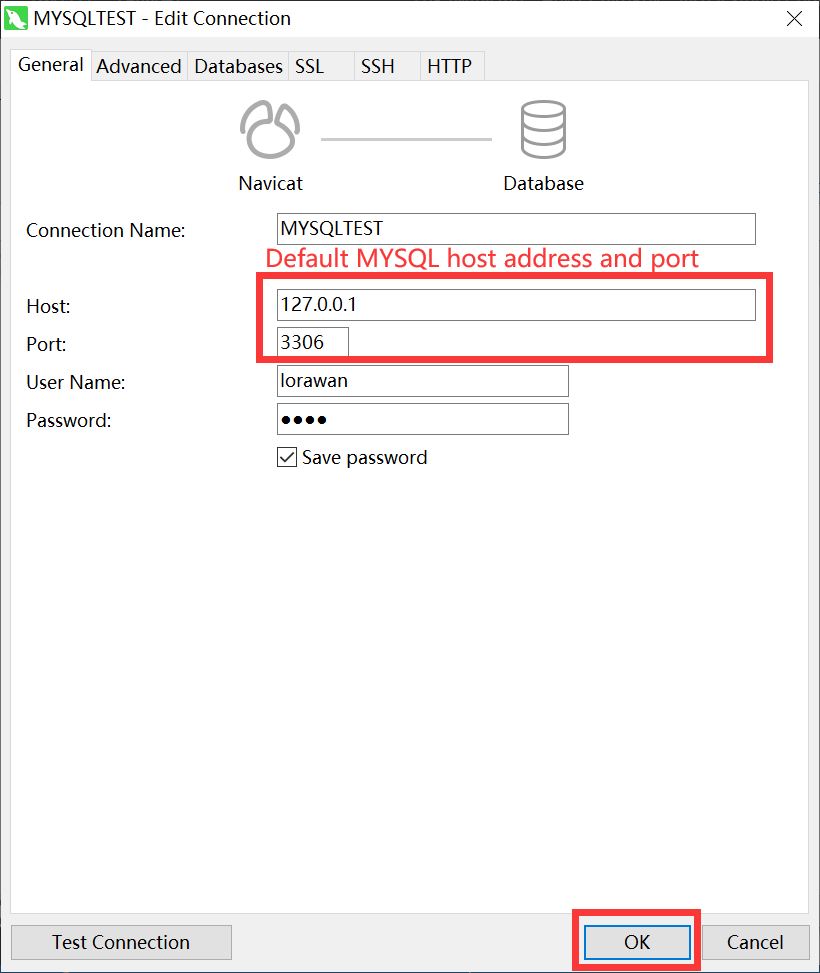
- Connect to MYSQL service with
lorawanin Navicat:
3.1.2 Python examples
- This example subscribes and publishs the topic as shown in MQTT explorer, for example
application/2/#. - See topic name format here
2. Log MQTT data to MYSQL database
- This example subscribes the topic
application/2/#and saves data in the MYSQL database nasedLoRaWANChirpBox. - Table name is generated automatically according to the UTC time.
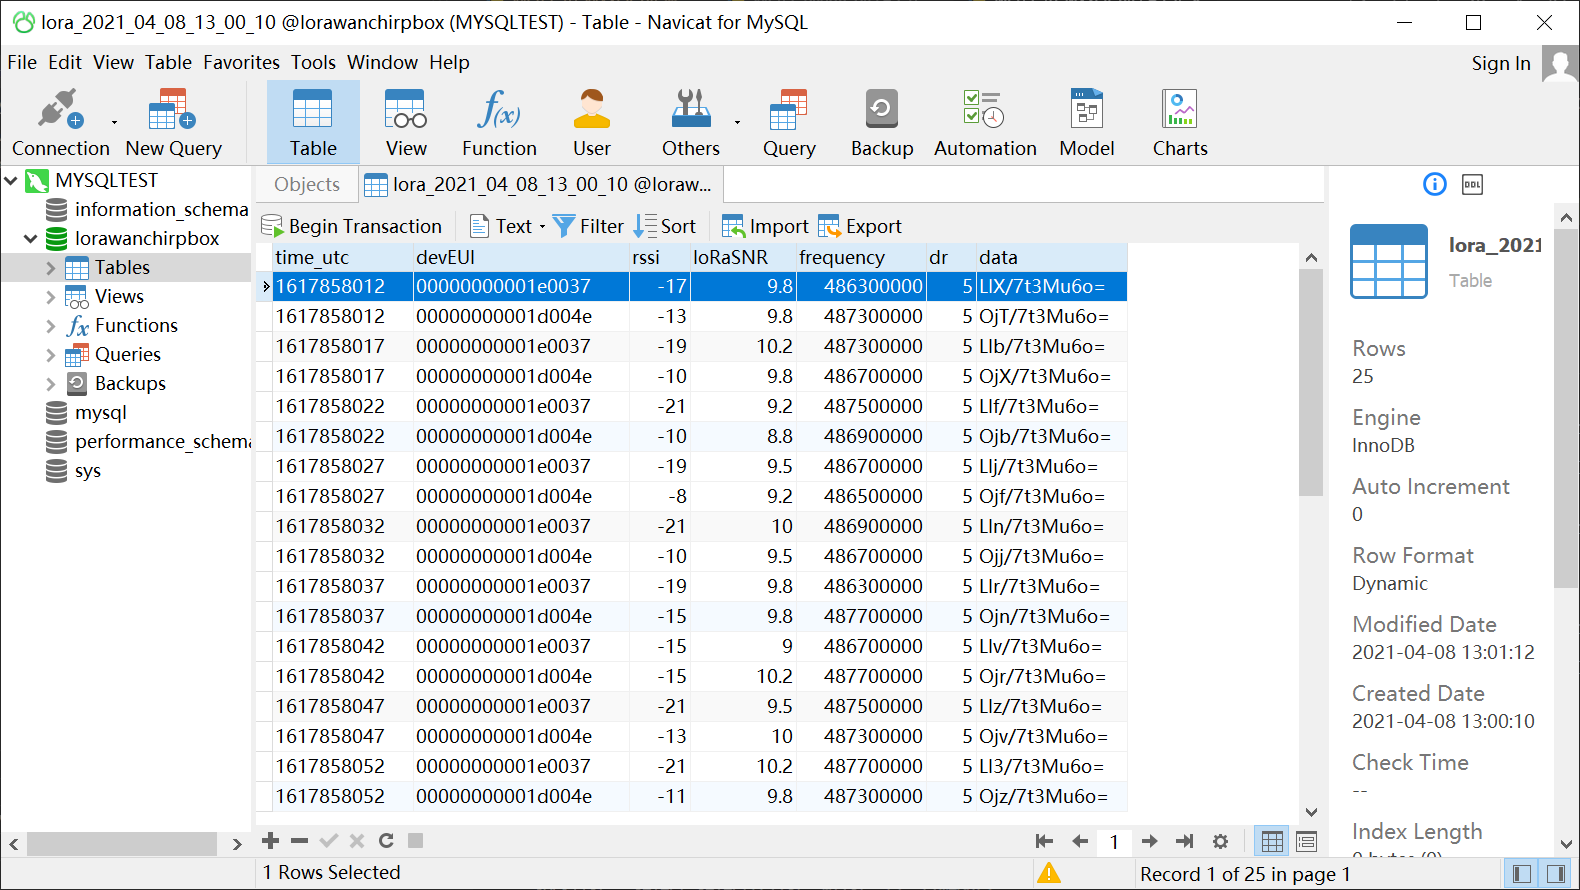
- We store the UTC time, device EUI, RX and TX information in the table, which can be seen through Navicat:
3.2 ChirpStack API
ChirpStack APIs are provided to achieve data integration. See how to setup with following steps:
3.2.1 JWT config
1. JWT secret
- Login to gateway and generate a JWT secret
1 | pi@rak-gateway:~ $ openssl rand -base64 32 |
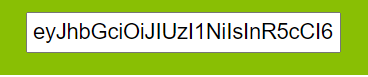
Get the result, for example: UXAGc5YdnRhxSZsKFMwTegUOpgM/2uJzlxzpNdqrqk4=
- Open the chirpstack-application-server configuration:
1 | pi@rak-gateway:~ $ sudo nano ../../etc/chirpstack-application-server/chirpstack-application-server.toml |
- Change
jwt_secrethere accordingly:
1 | jwt_secret="" |
Ctrl+Oto save the configuration.
2. JWT token
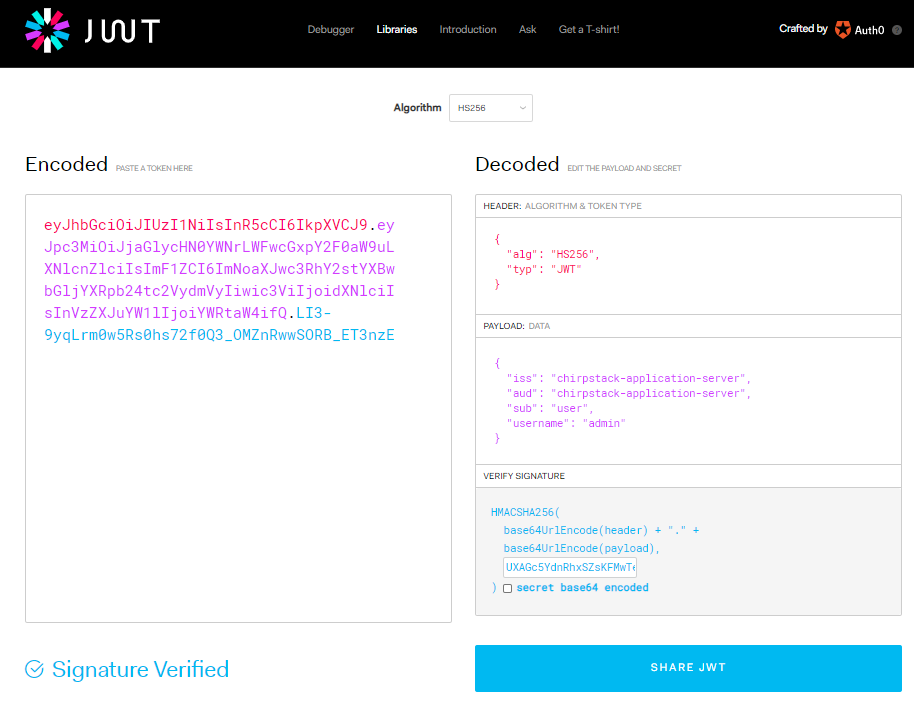
- Open jwt.io and input the decoded data with Header and Payload respectively:
1 | { |
1 | { |
- Replace
your-256-bit-secretwith the JWT secret (do not tick thesecret base64 encoded) - The JWT token is then shown in the left
- If you want to verify if the JWT token is valid, go to the ChirpStack API web interface (http://localhost:8080/api, localhost is the ip_address of the gateway):
- Input JWT token on web interface
- Click
GET/api/applications, pressTry it out!below the page - If the
Response Codeis not200, check above steps to make sure JWT secret and JWT token are correct.

3. Network Address Translator (NAT)
- To build NAT of the gateway for external network access, download Oray for Raspberry Pi and put it in
/home/pi/ - Execute following commands in the
/home/pi/folder
1 | pi@rak-gateway:~ $ sudo -s |
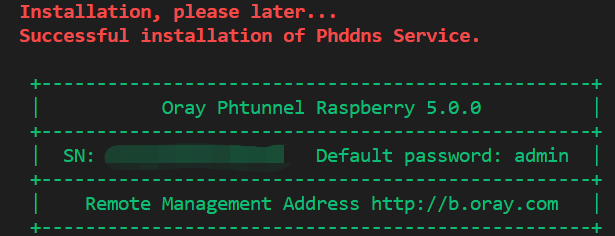
- Control phddns with following commands and make sure it is online
1 | phddns start | status | stop |restart | reset |enable (Turn on self-starting)|disable(Turn off self-starting) |version |
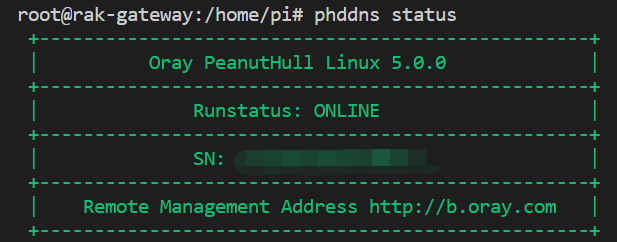
- Login to Oray with the SN code and password
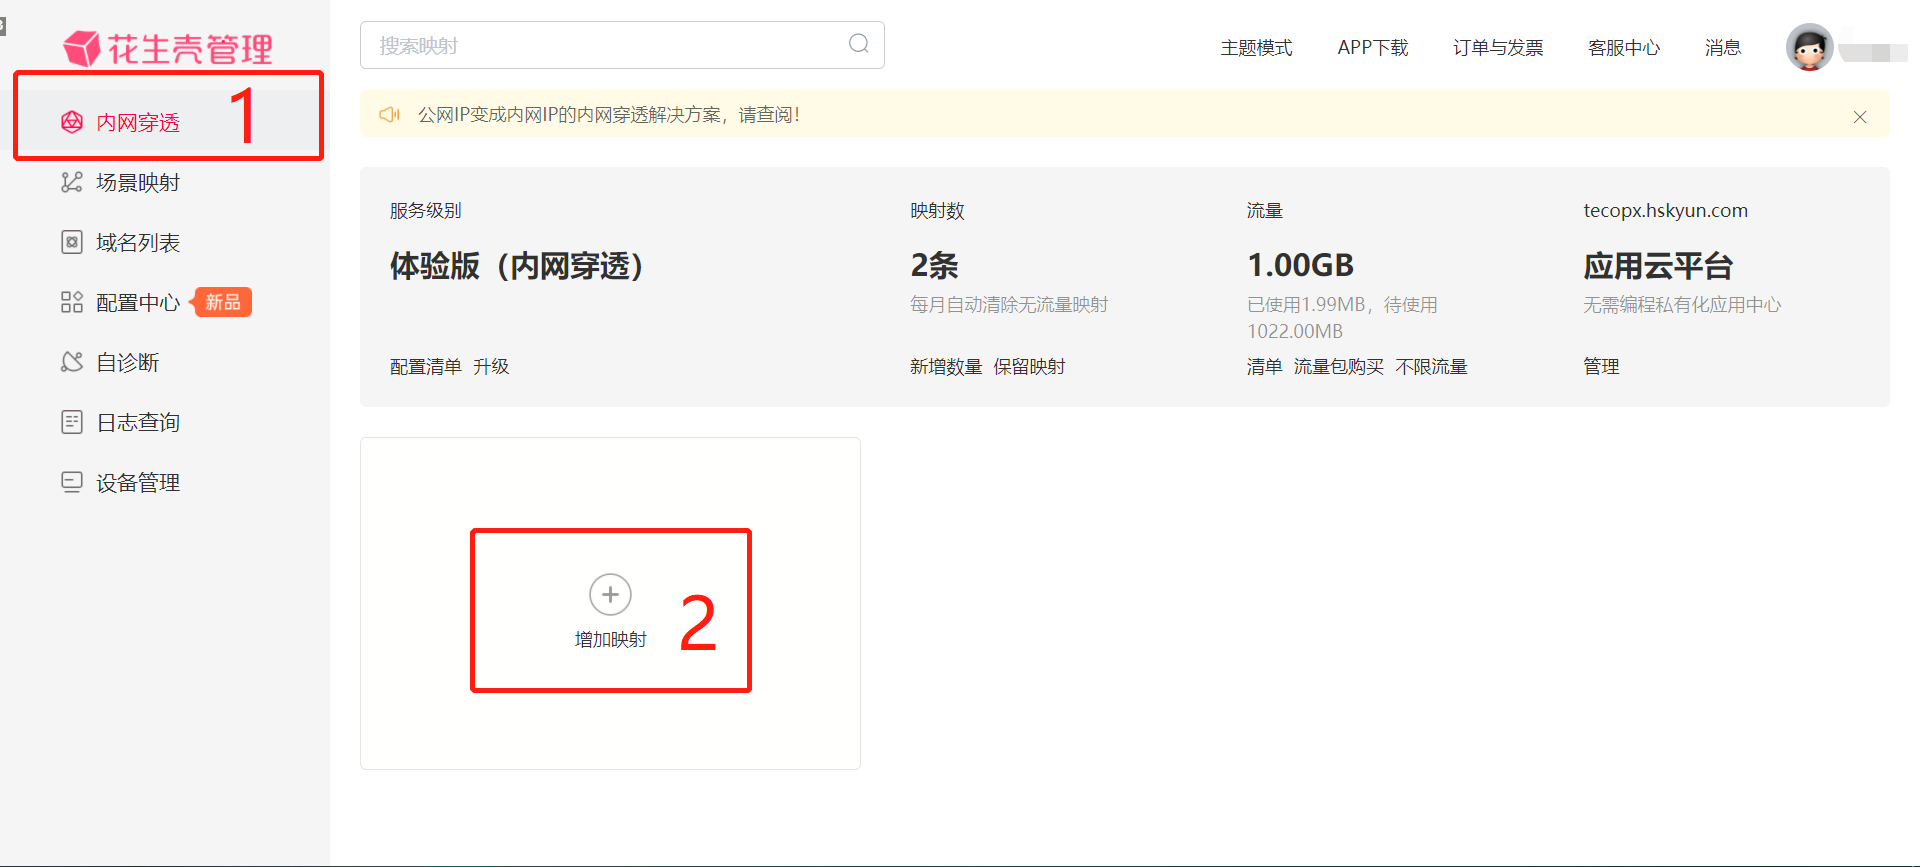
admin - Follow these steps to create the domain name connected to the gateway built-in ChirpStack
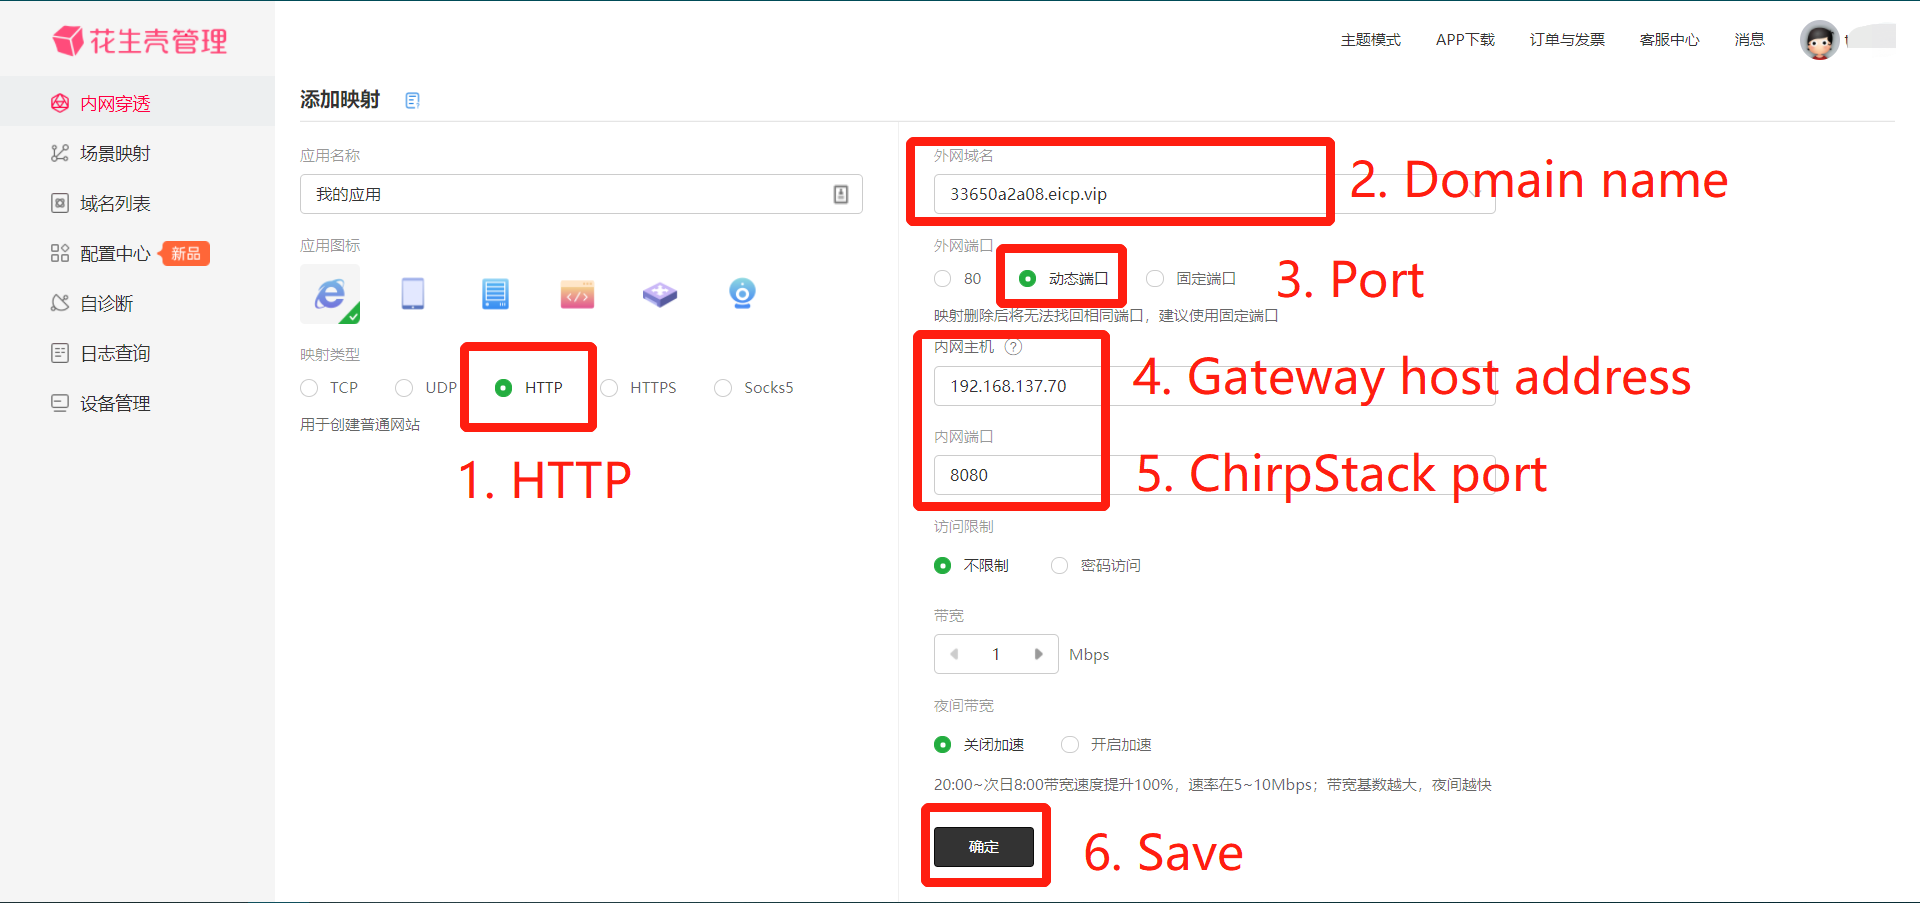
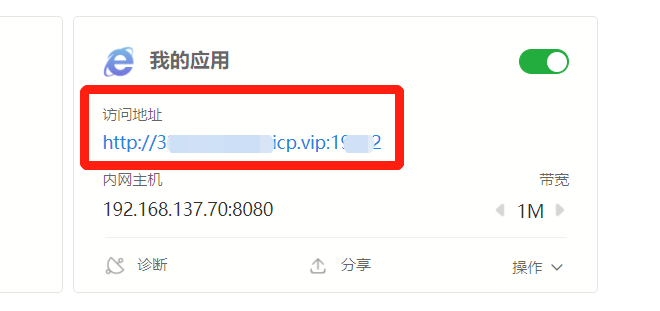
- Then we can access the ChirpStack through the Internet with created address:
https://33xxxxxxx.eicp.vip:xxxxx
3.2.2 Python examples
1. Enqueue downlink packets to the specified device
- This example is based on Downlink to Device provided by ChirpStack
2. Enqueue downlink packets to group
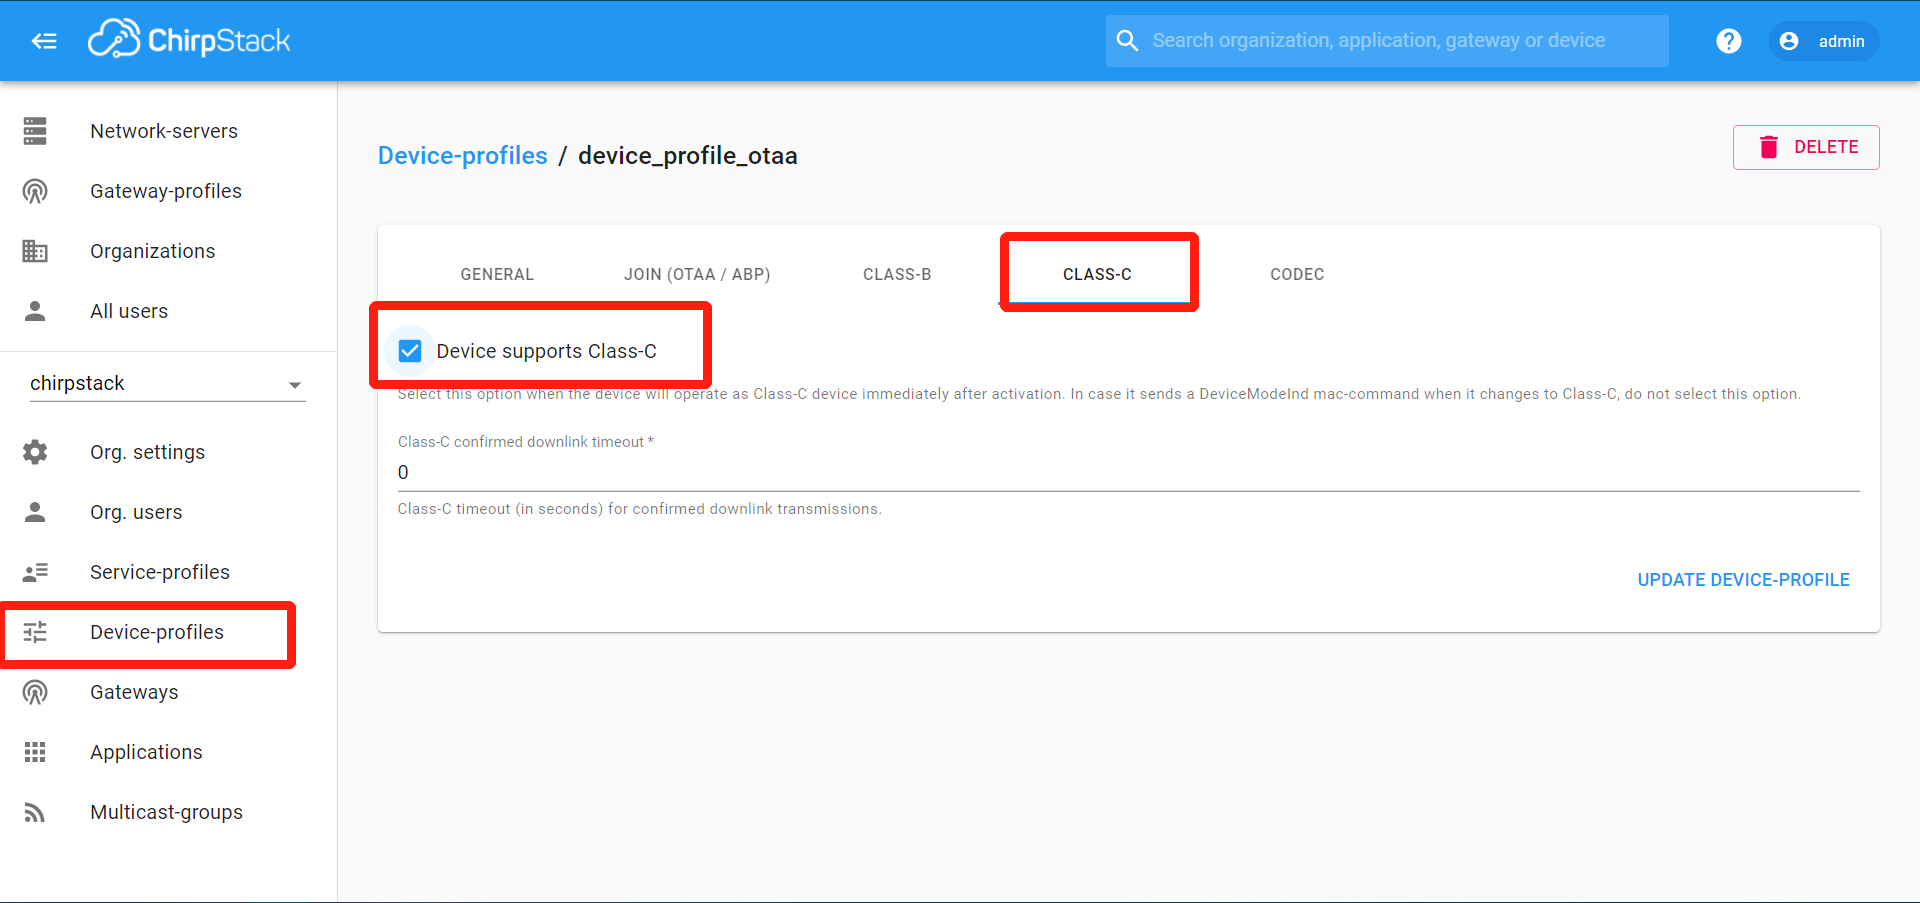
- Update device profile to supply Class C (when using Class A, remember to untick the Class C support)
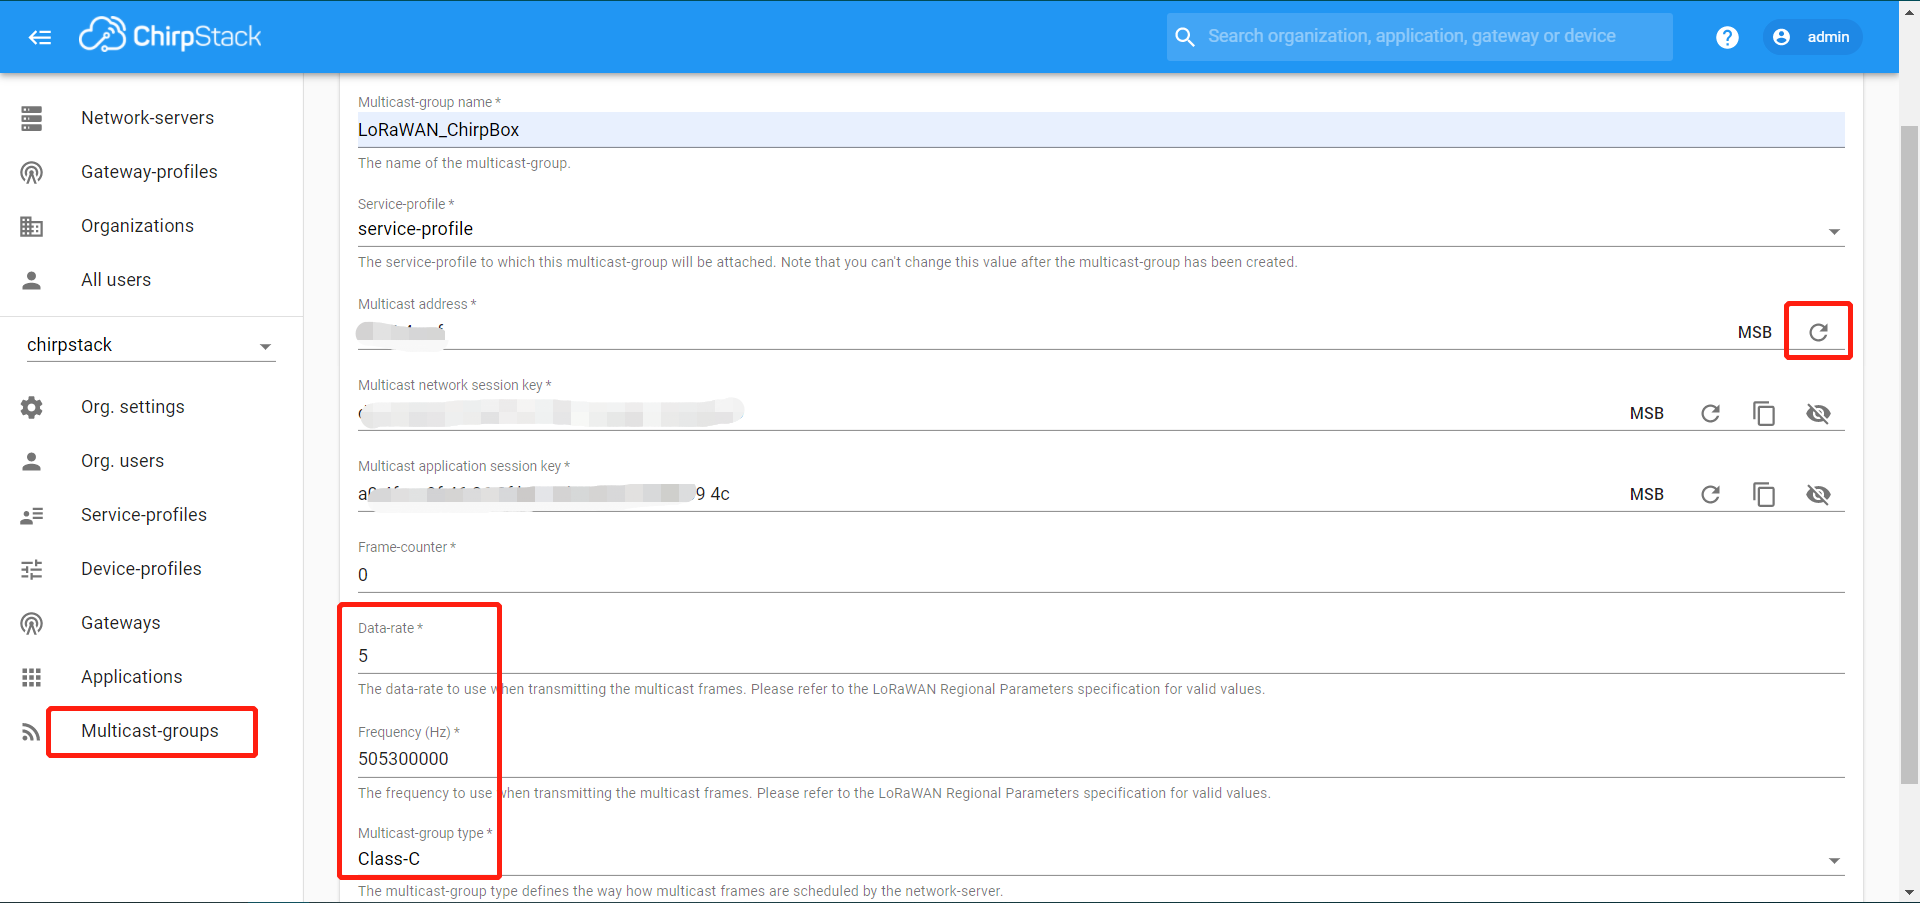
- Add a multicast group with following configurations:
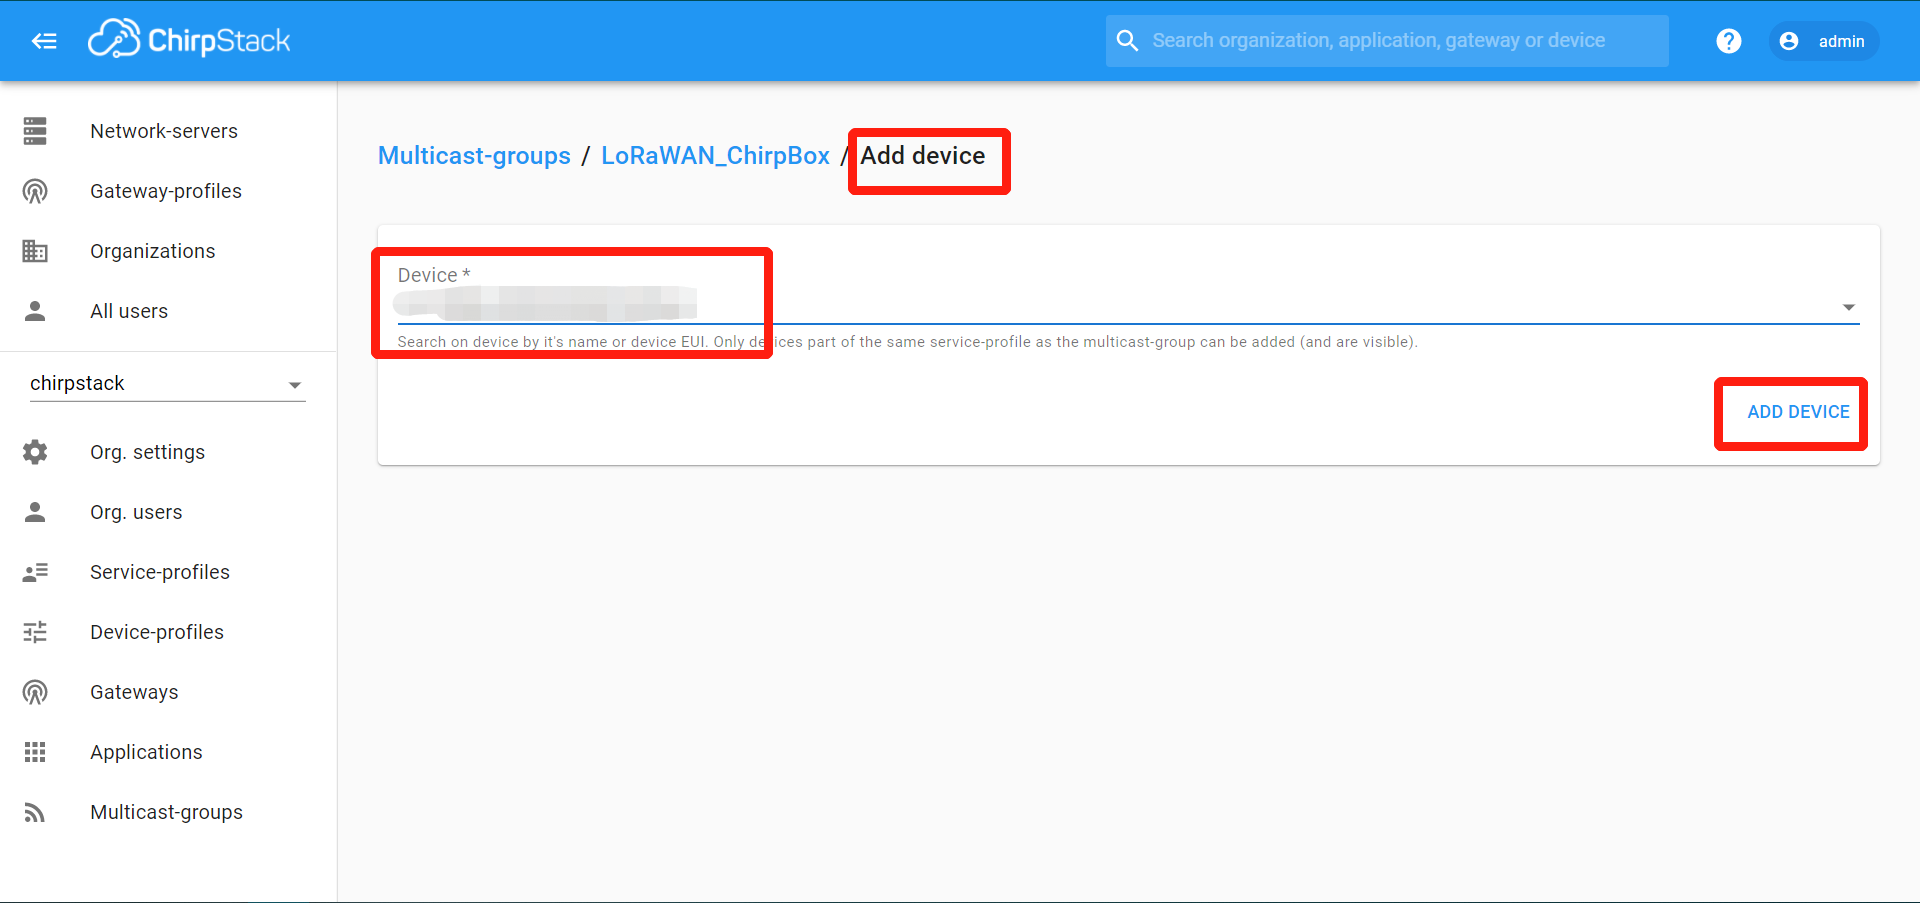
- Add devices in this group:
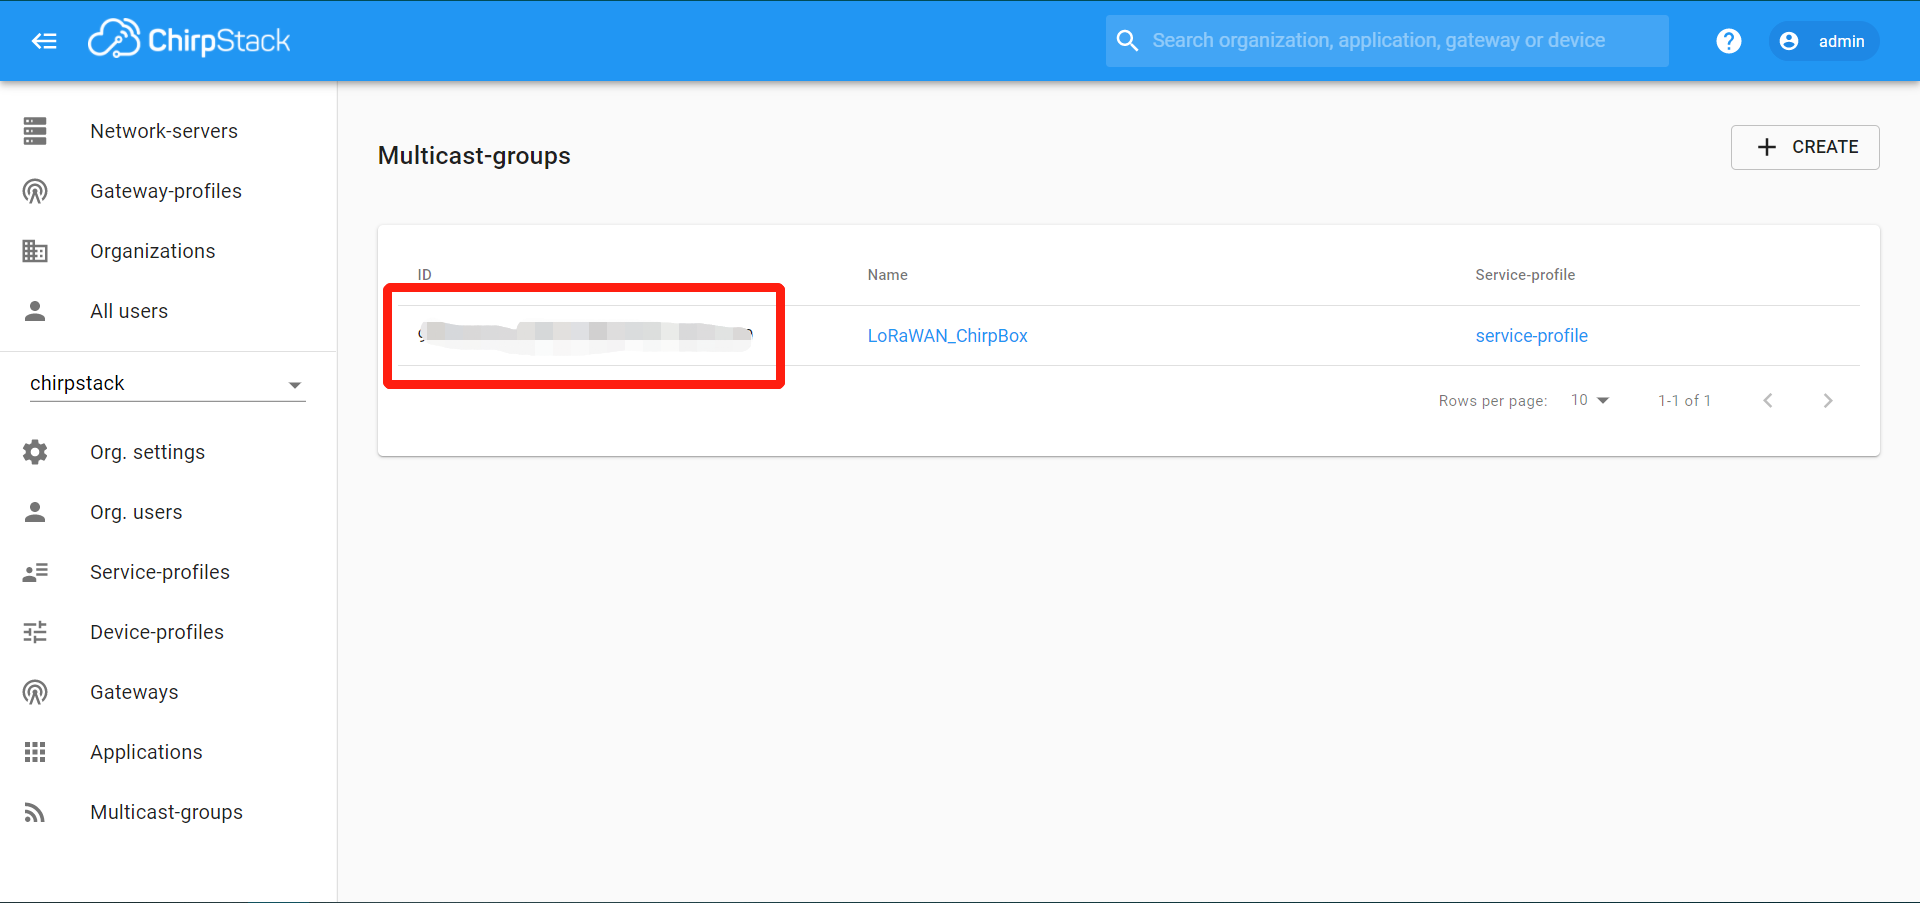
- Copy the group ID for Python codes:
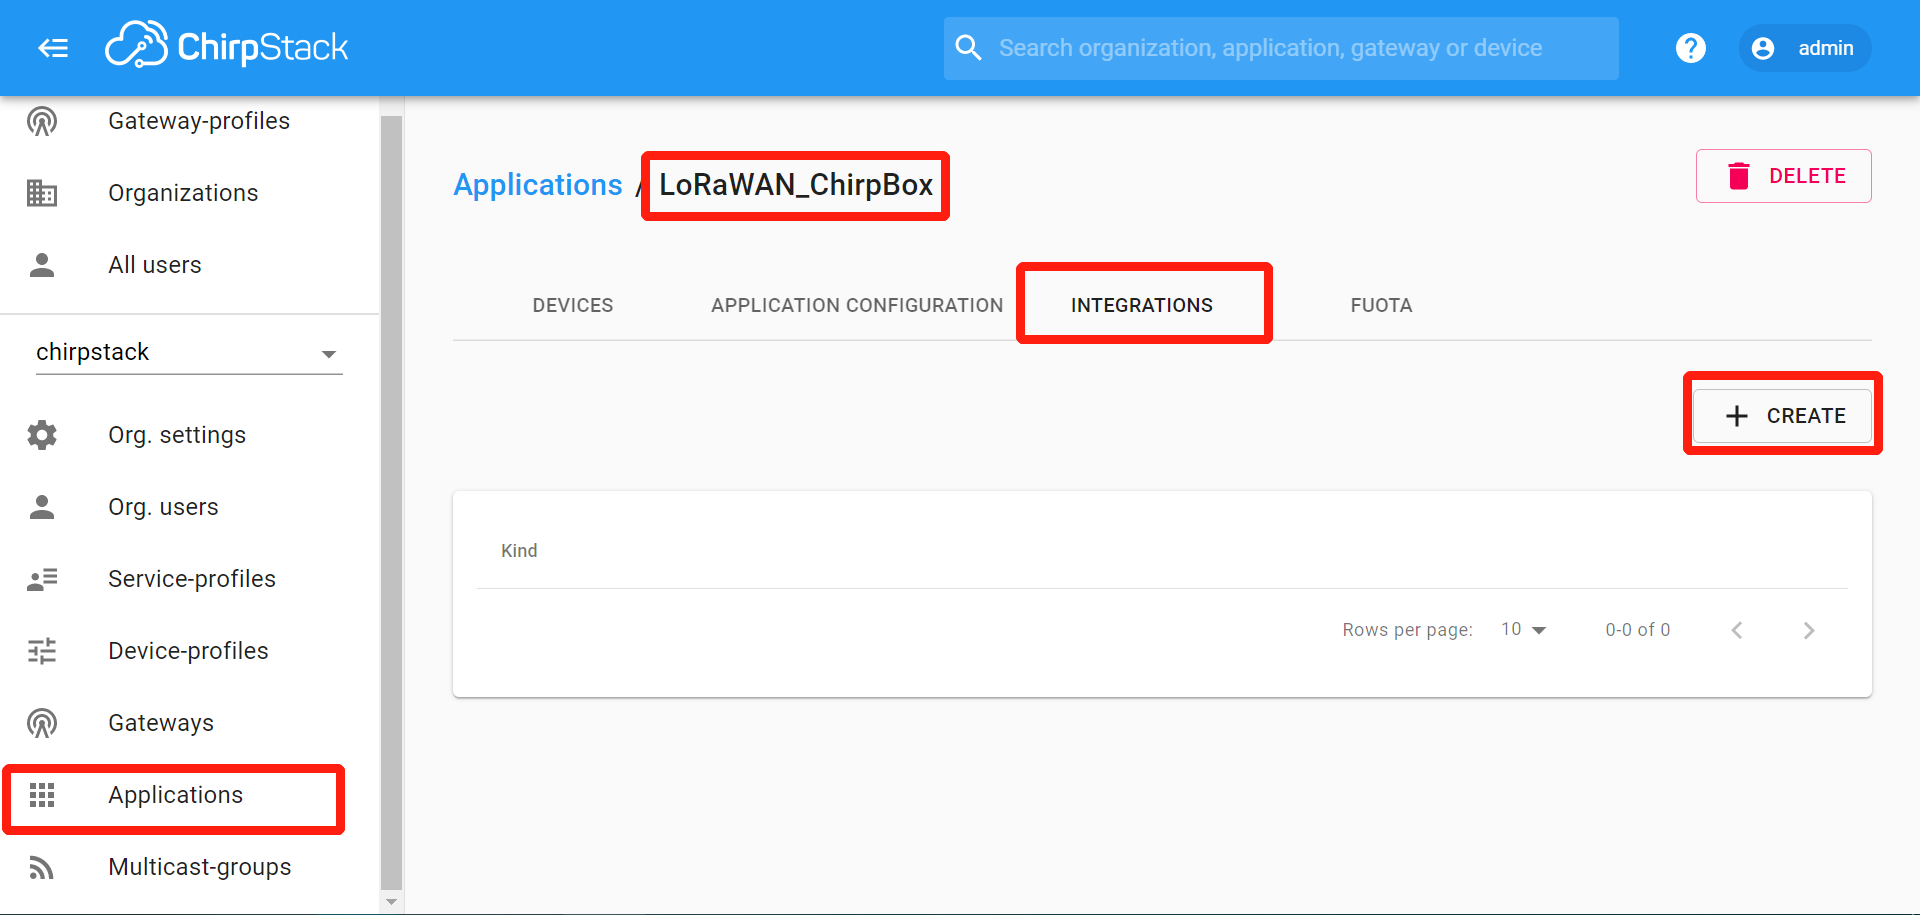
3.3 HTTP integration
HTTP integration with the Pipedream platform is fast to achieve data retrieving from ChirpStack.
3.3.1 Pipedream
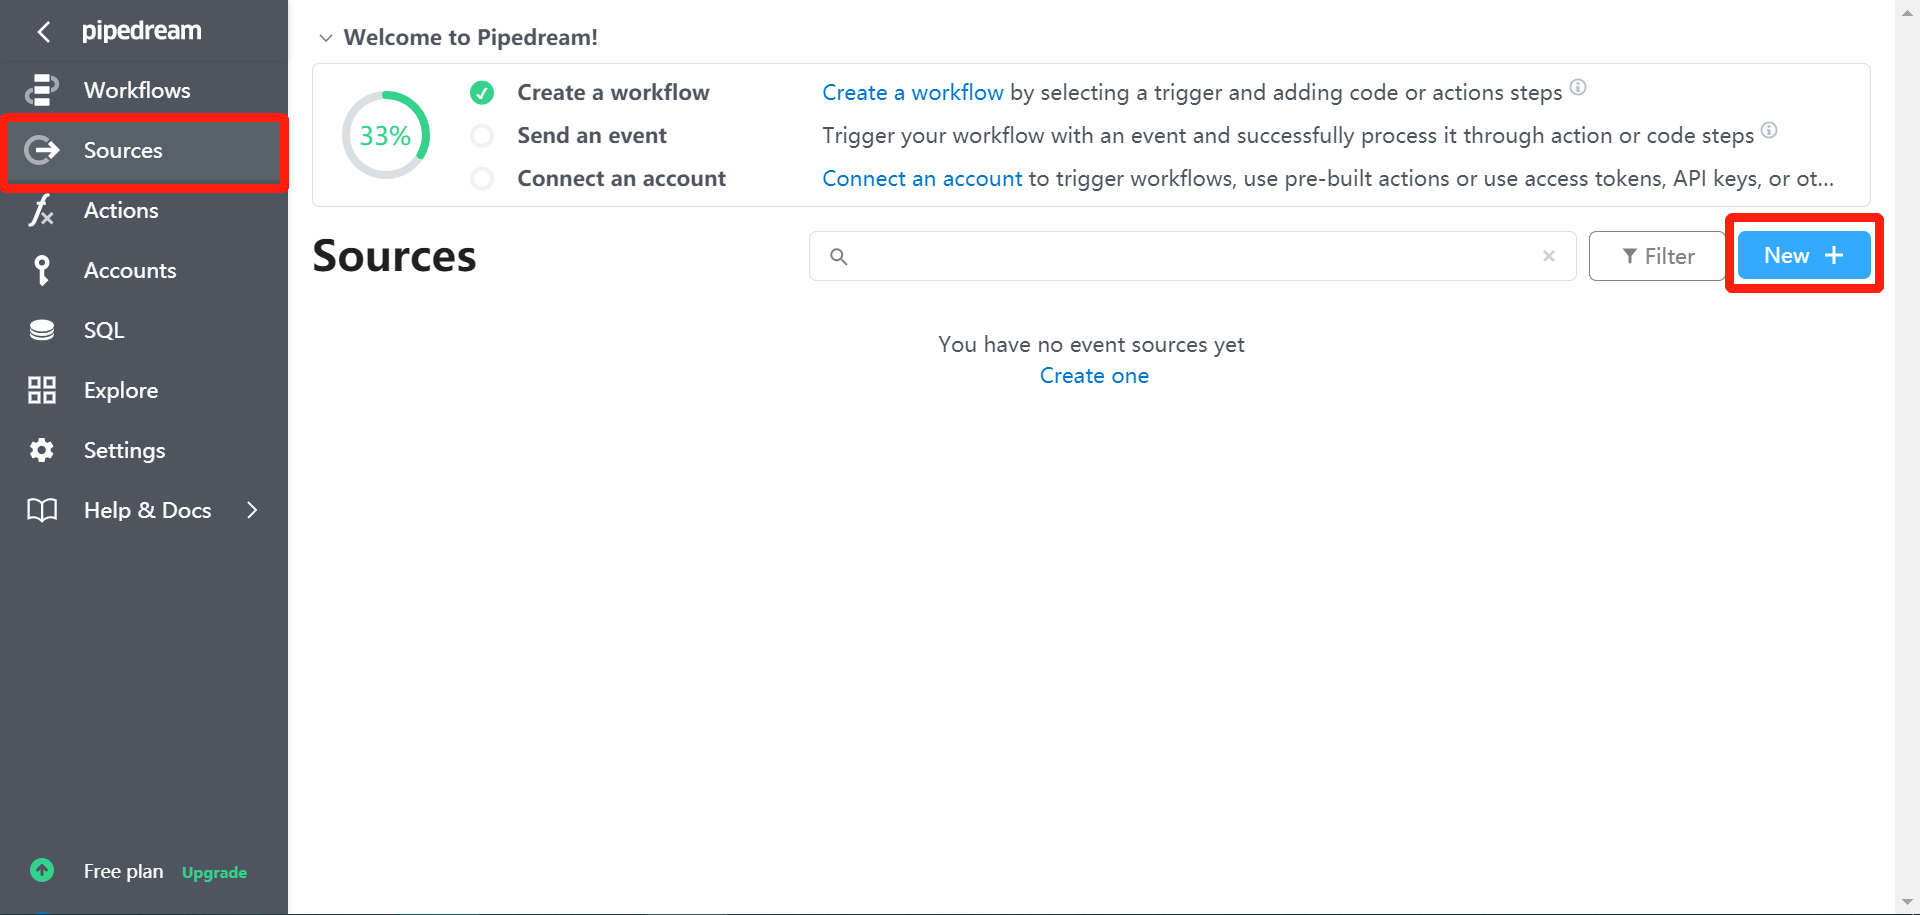
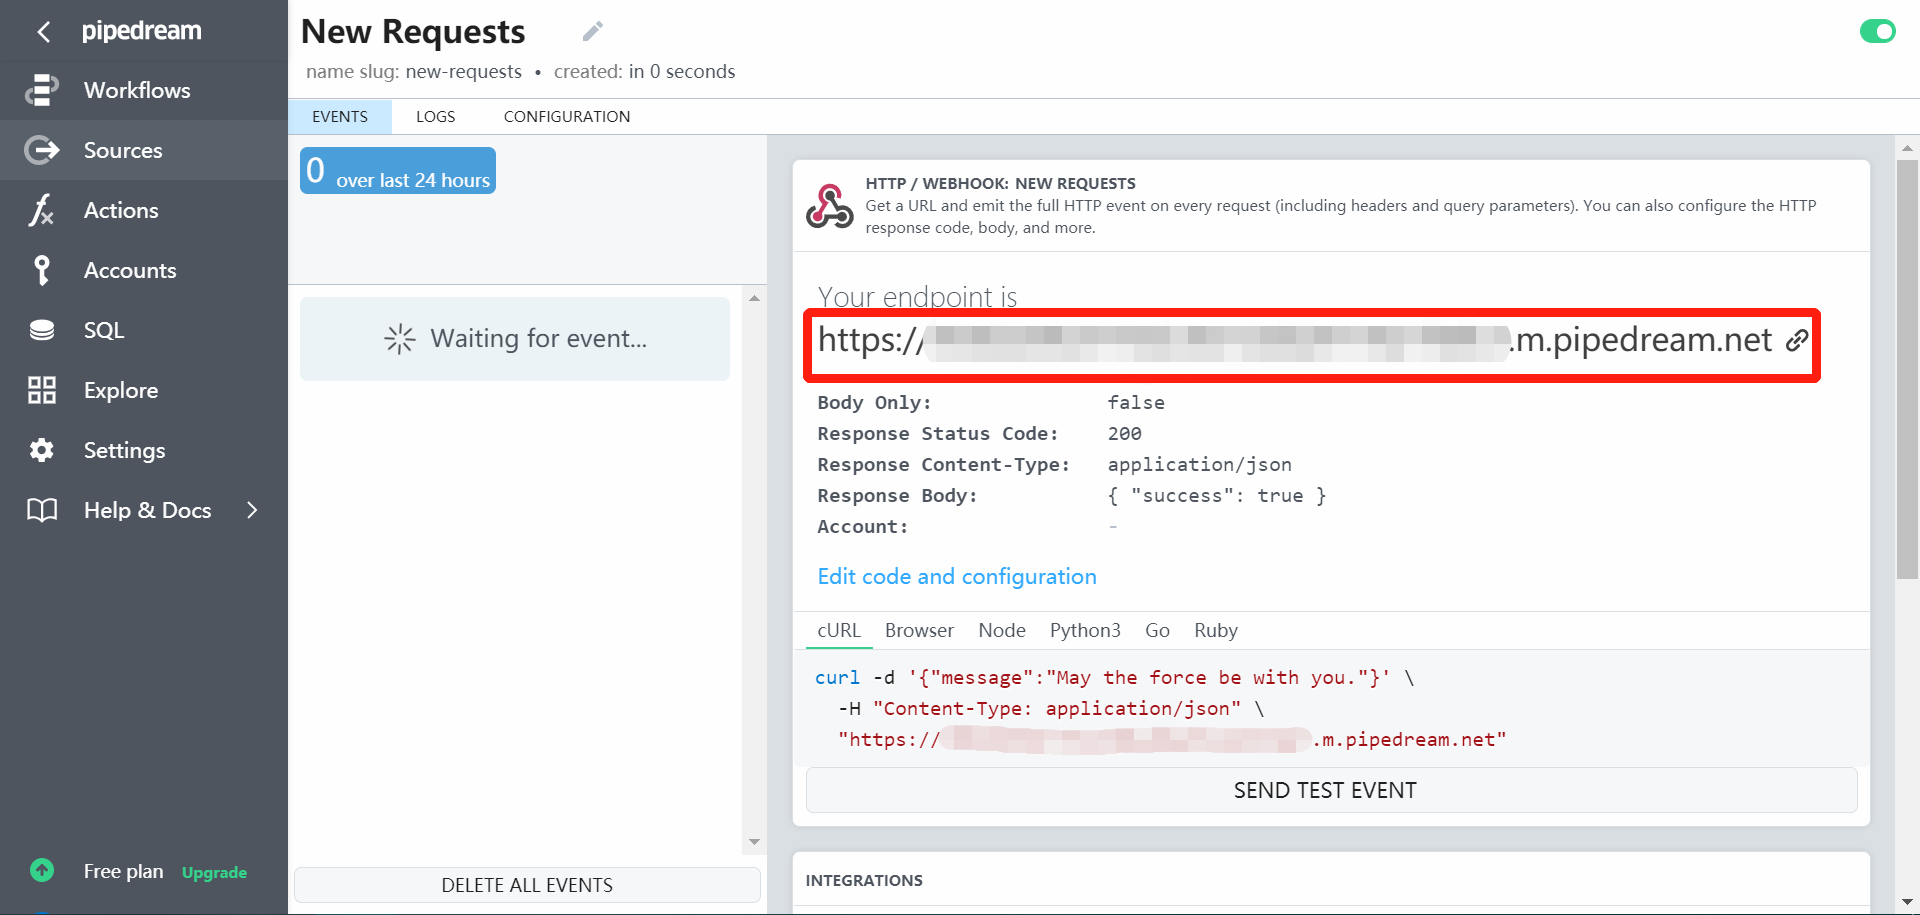
1. Pipedream connection
- Sign in Pipedream and select
New:
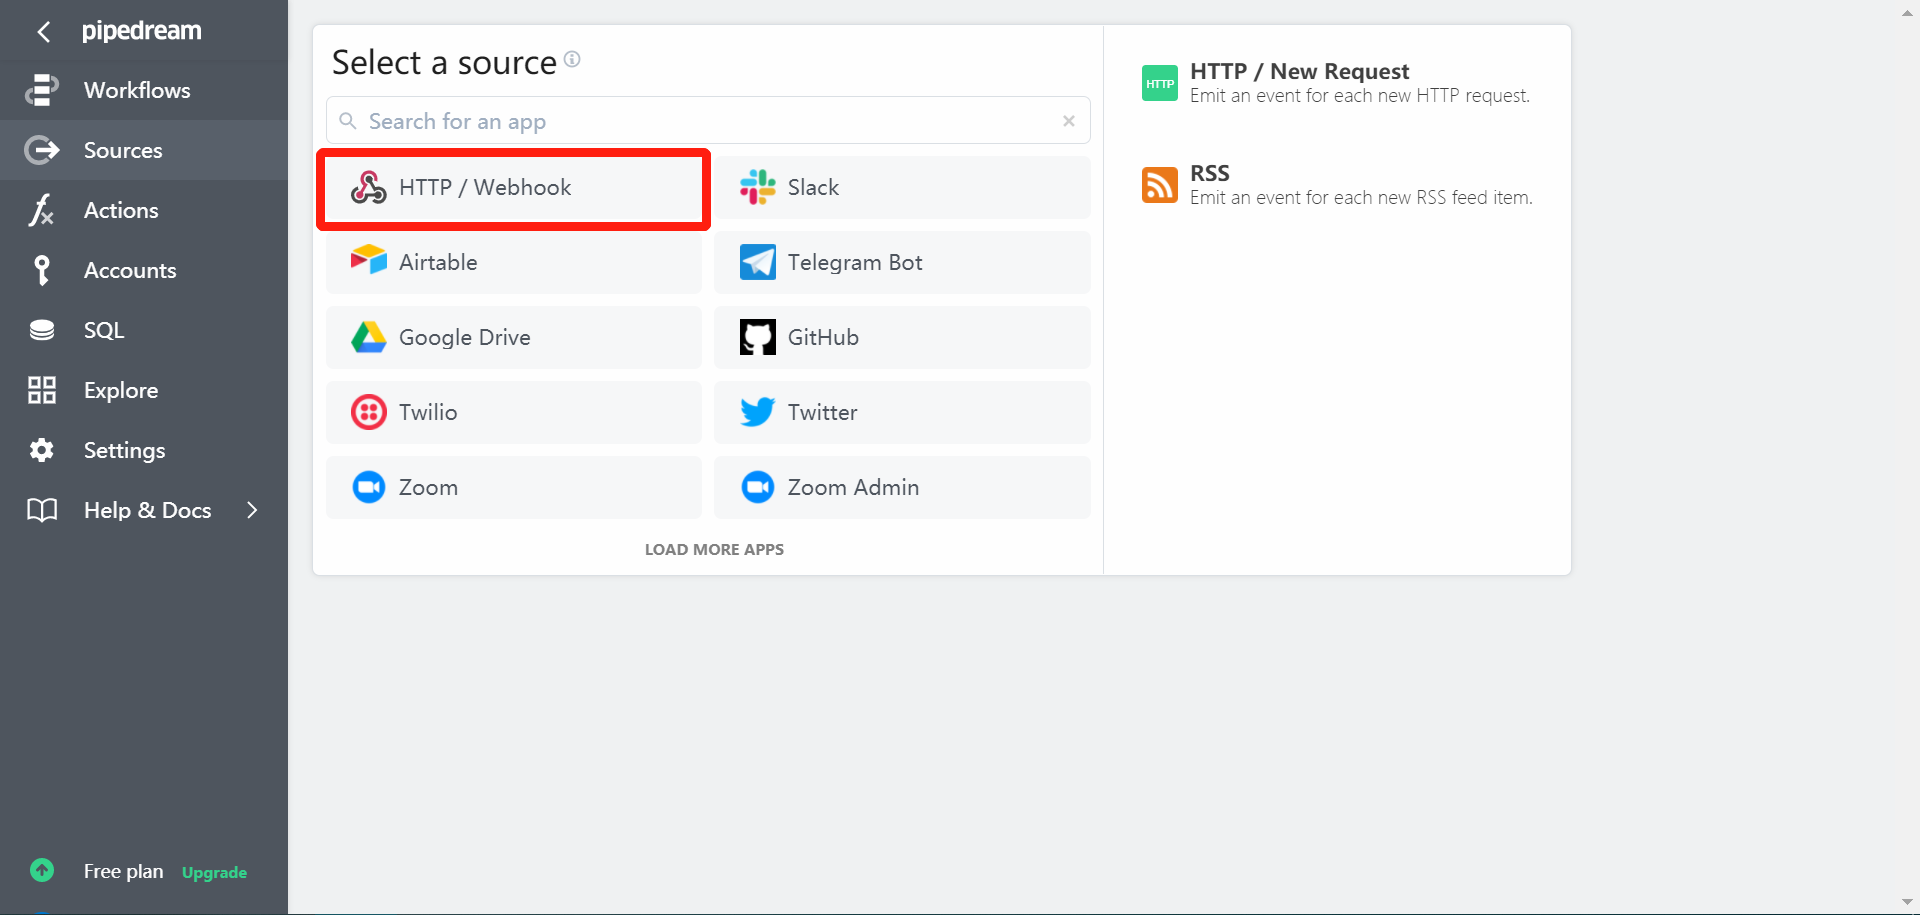
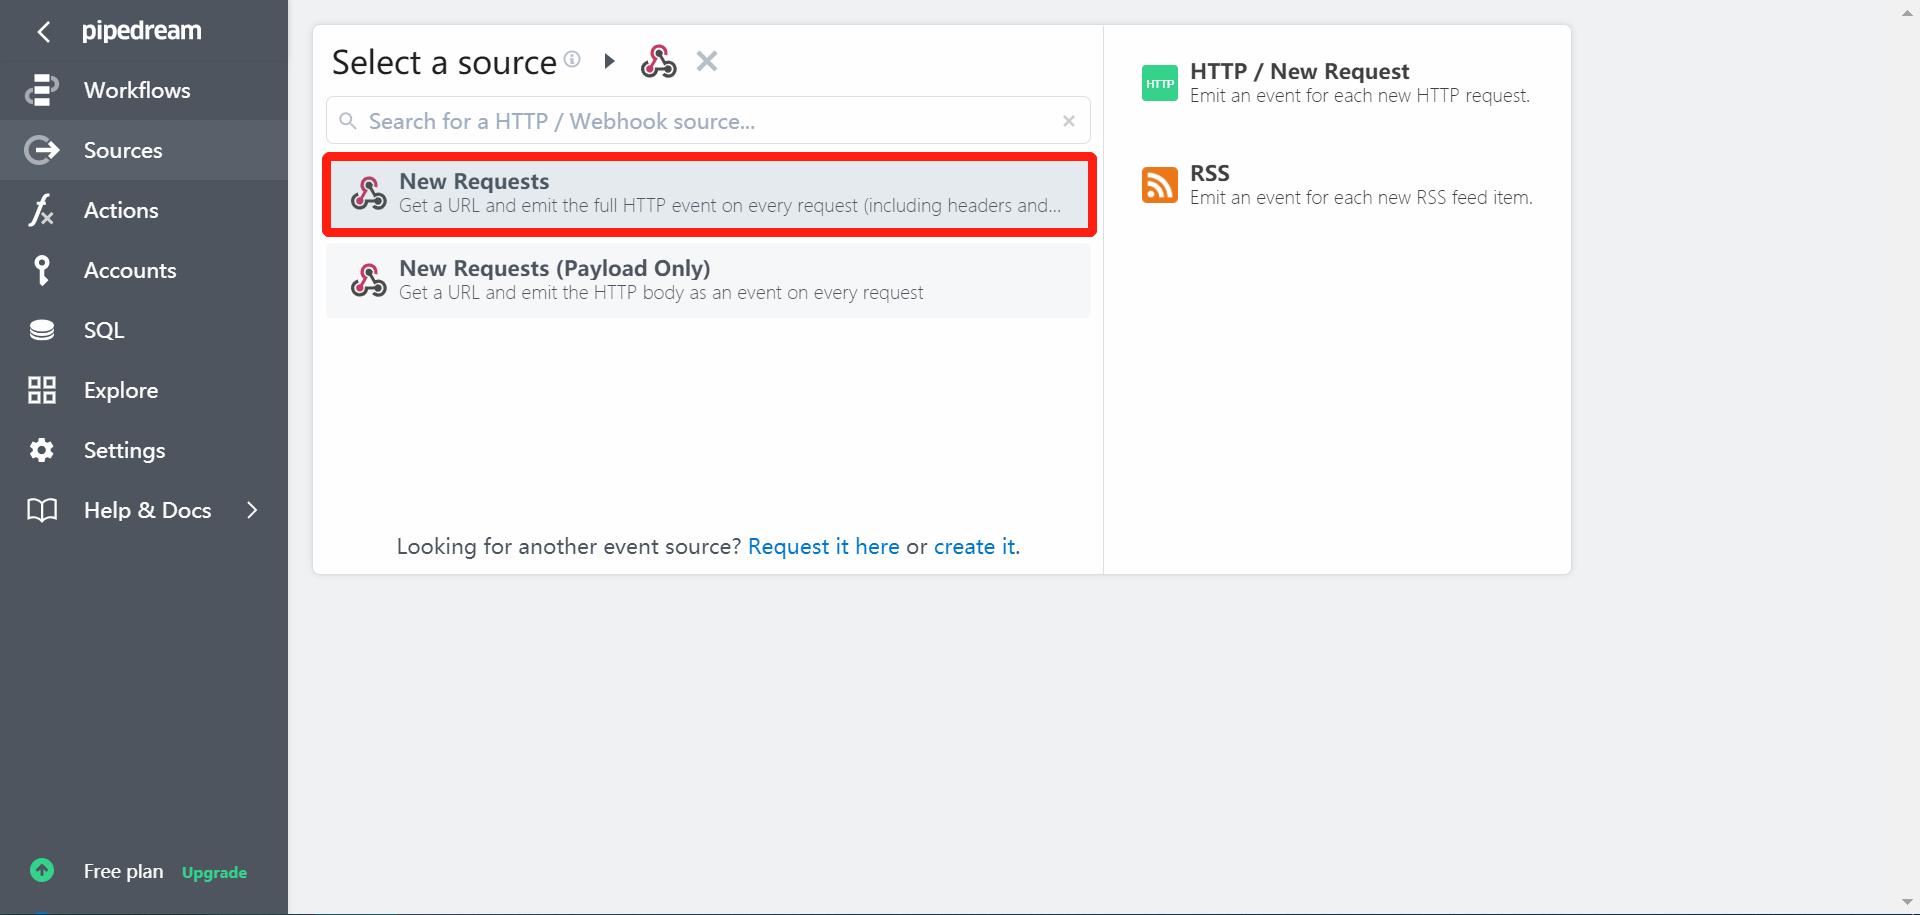
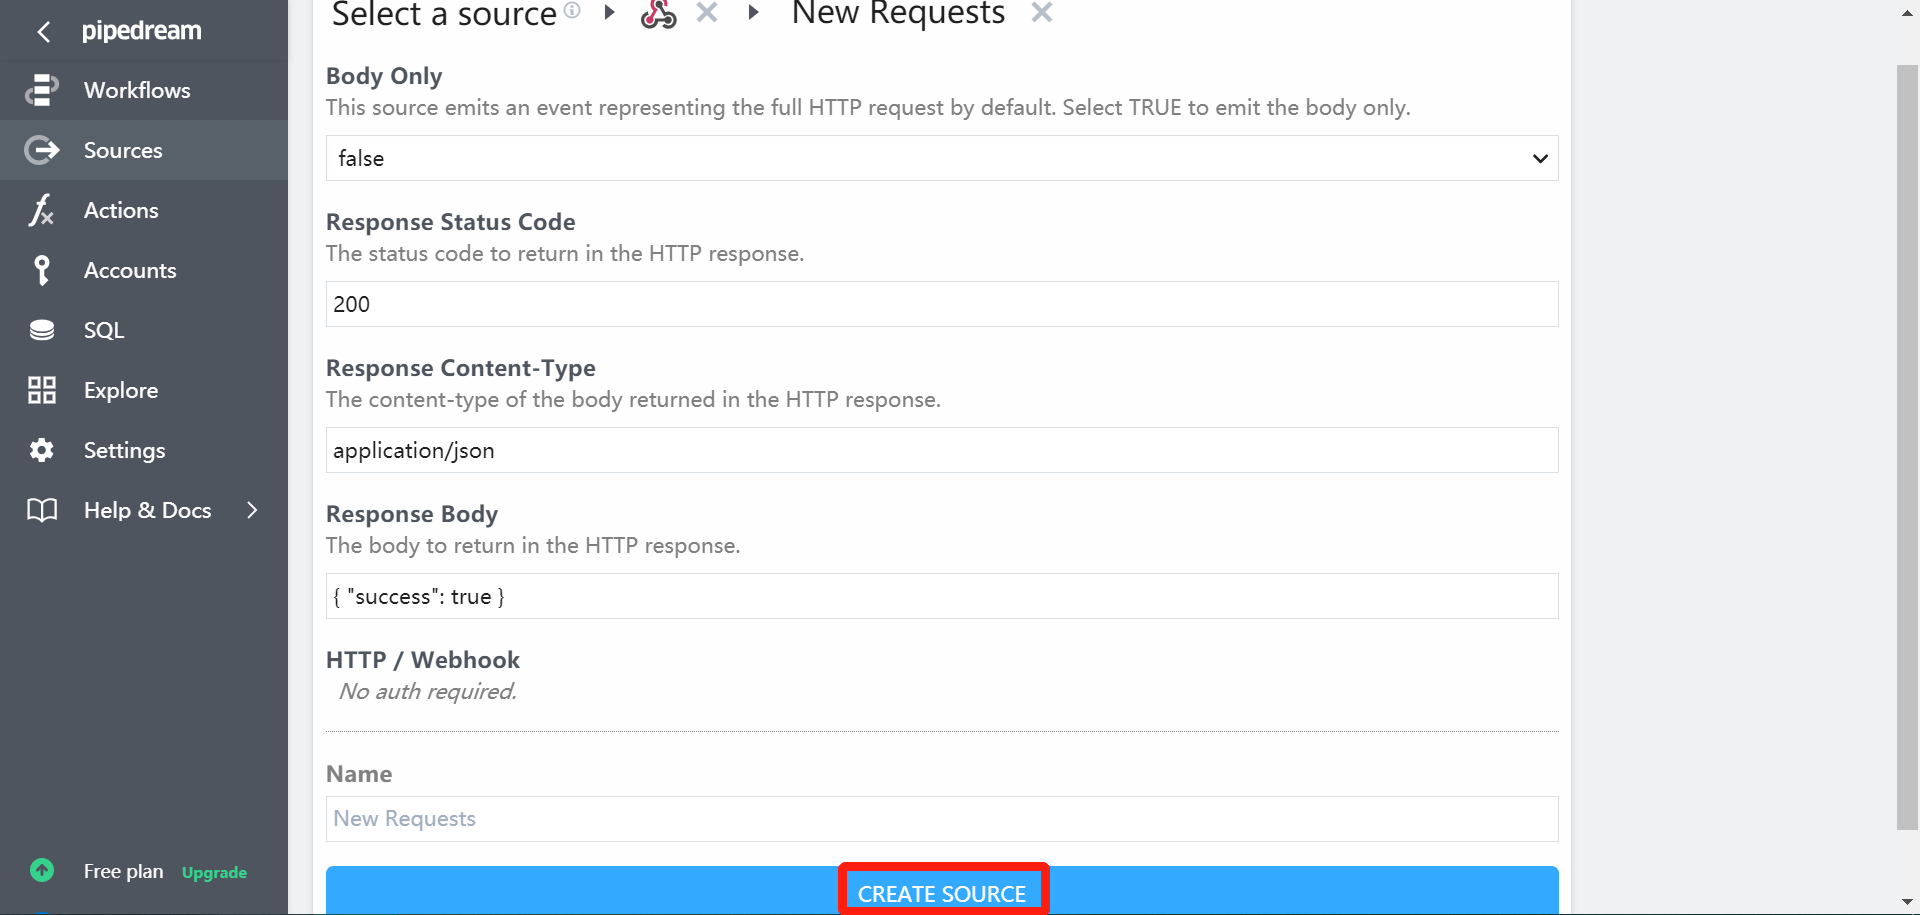
- Select and create a source with following (default) configs:
- Copy the HTTP endpoint:
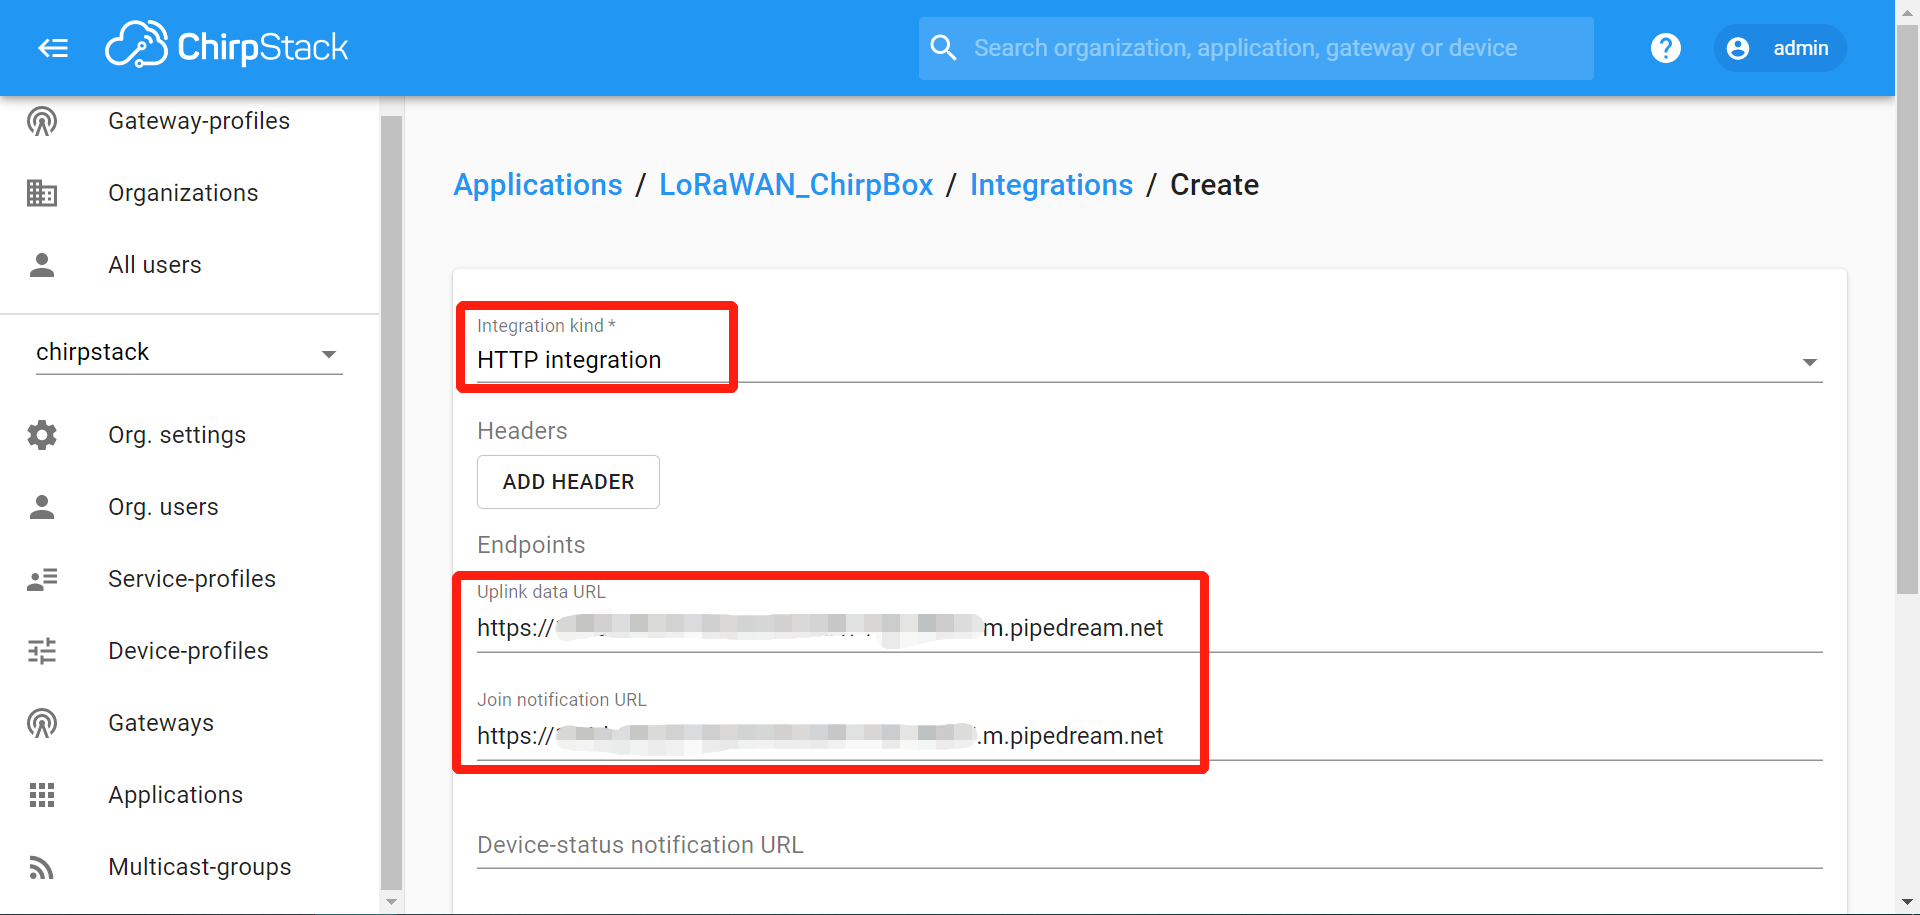
- Create the HTTP integration on ChirpStack’s application and paste the endpoint address:
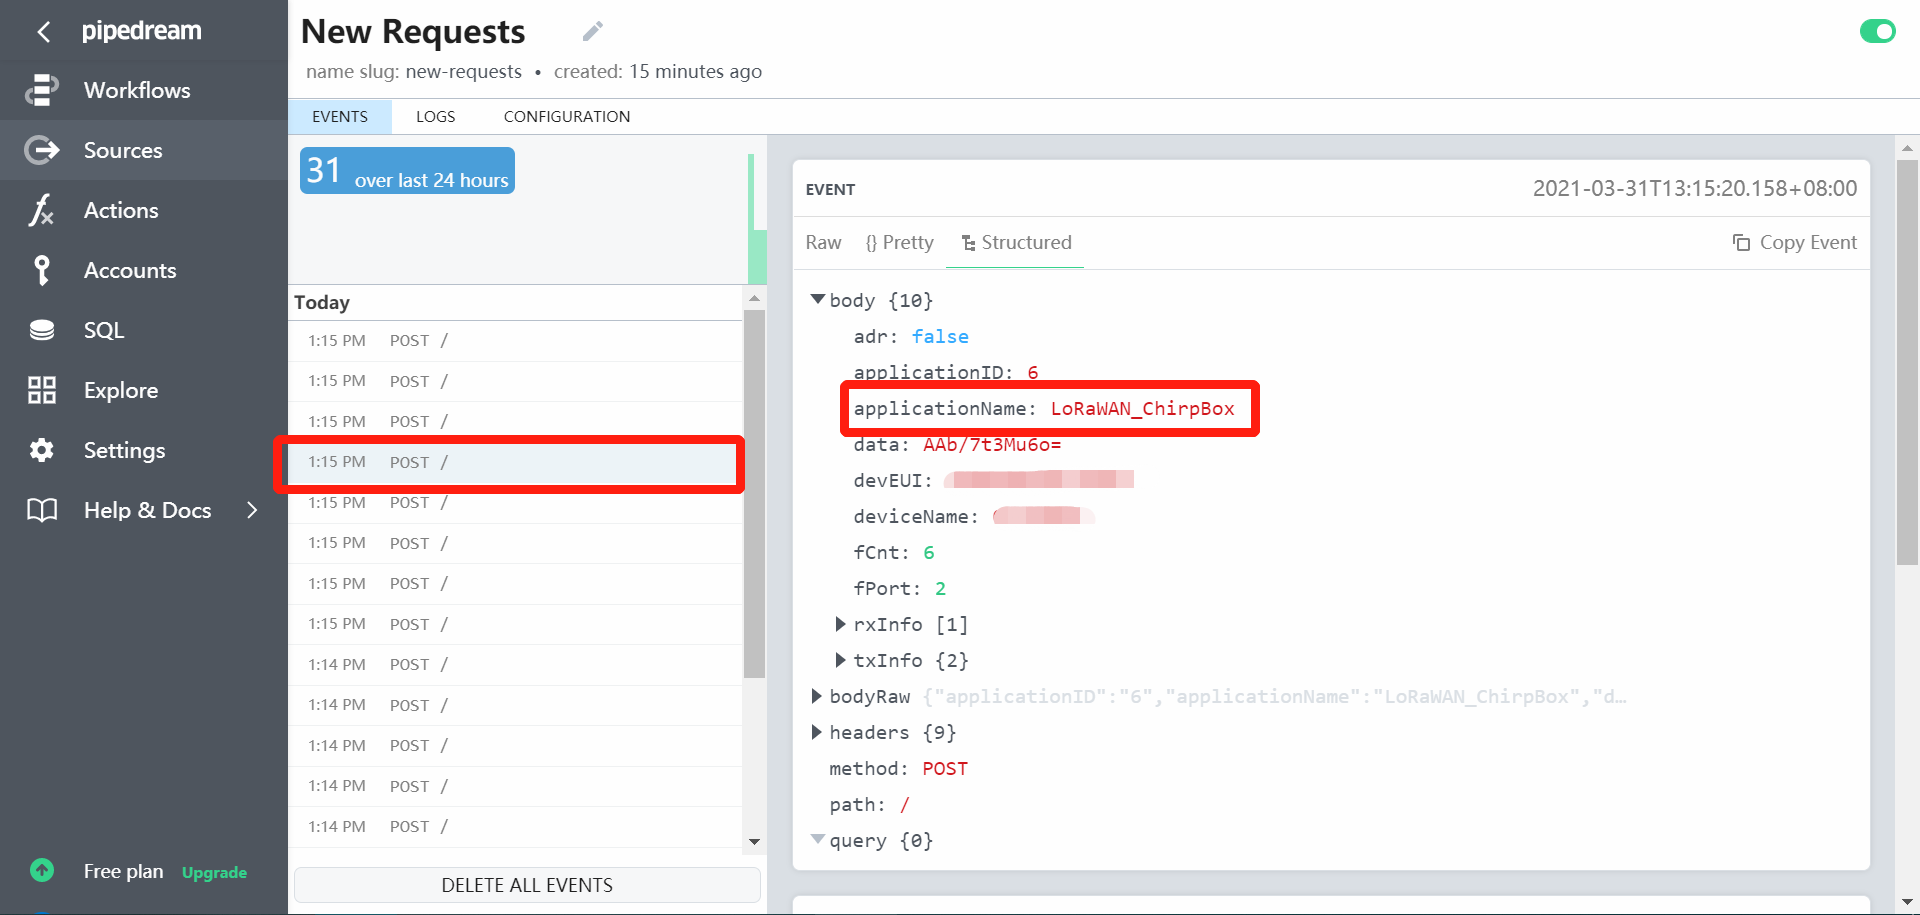
- Uplink LoRaWAN packets are shown as events in the inspector:
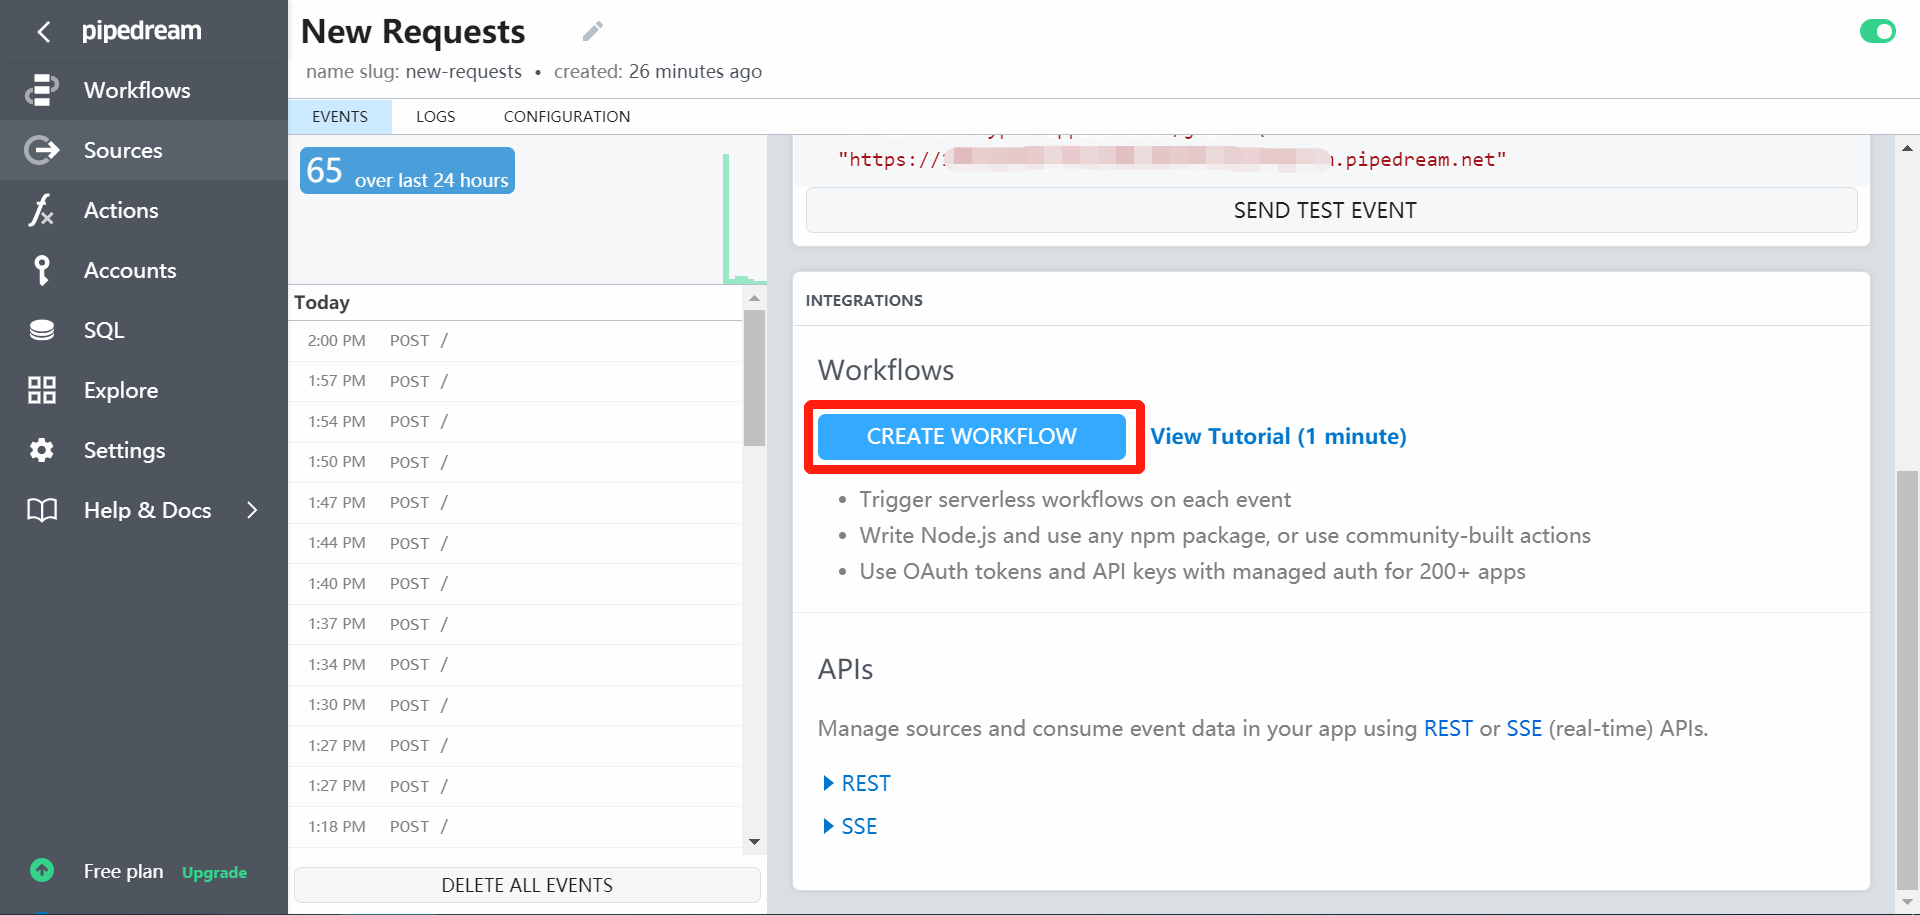
2. Pipedream SQL service
- Scroll down the source and tick
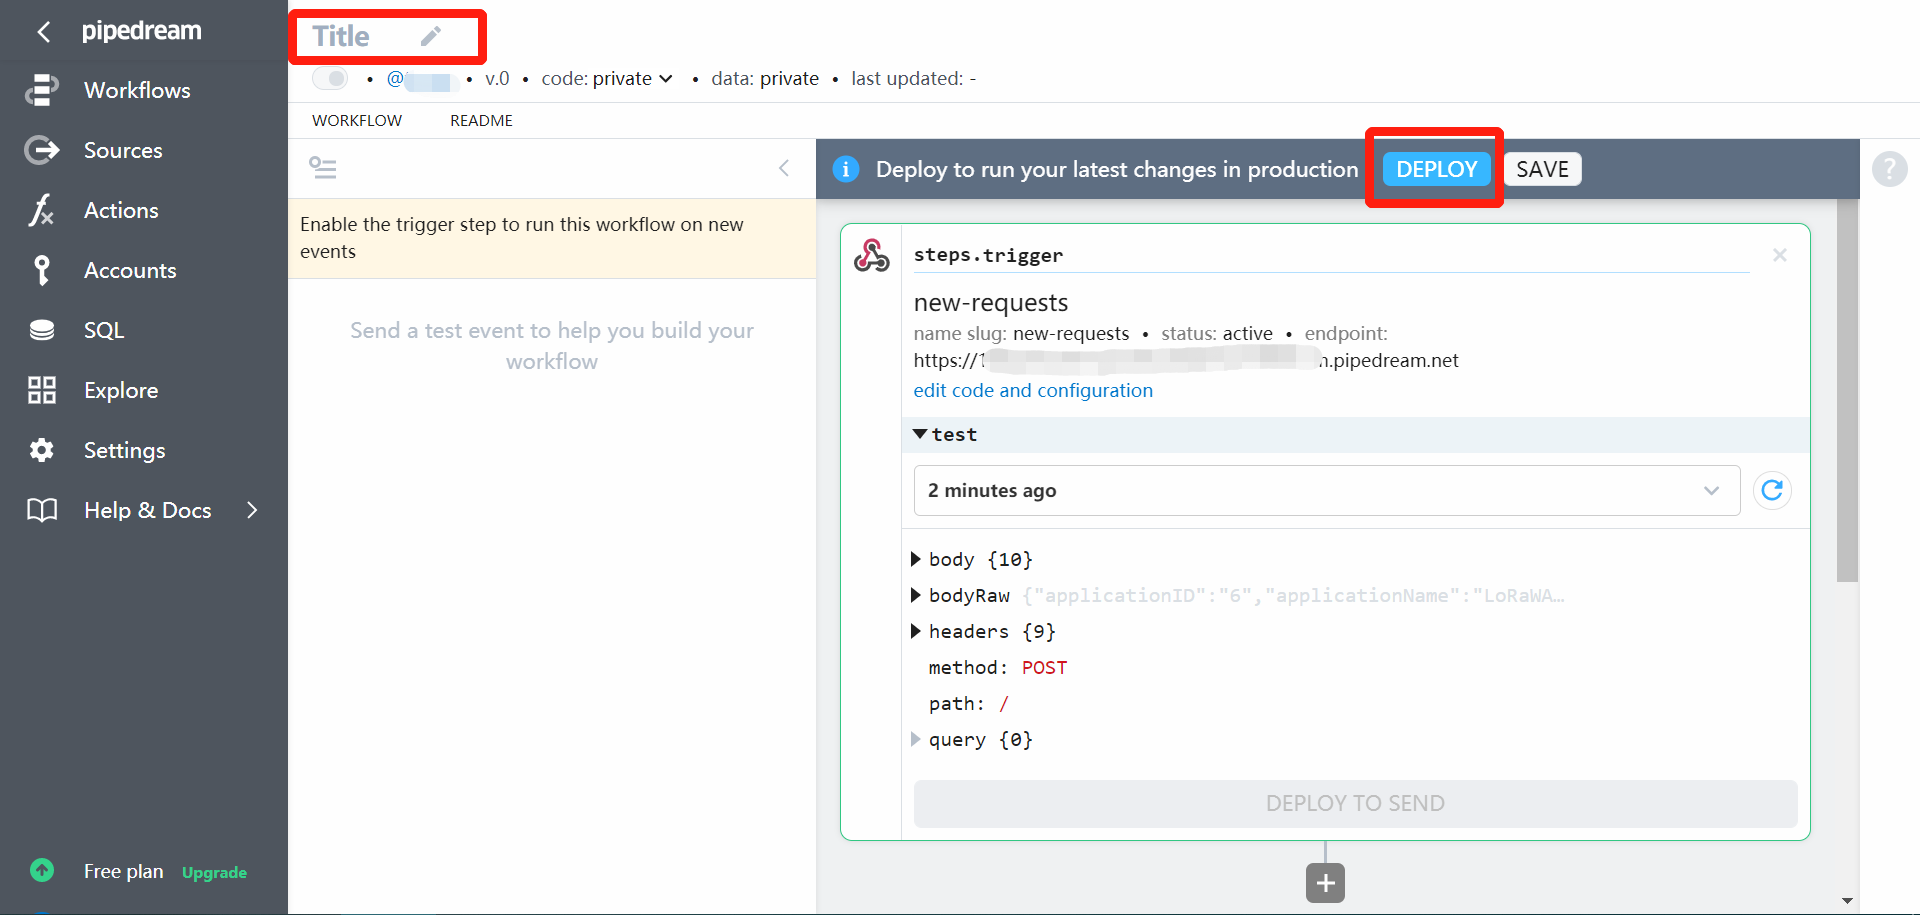
Create Workflow:
- Set a name of this workflow and deploy it:
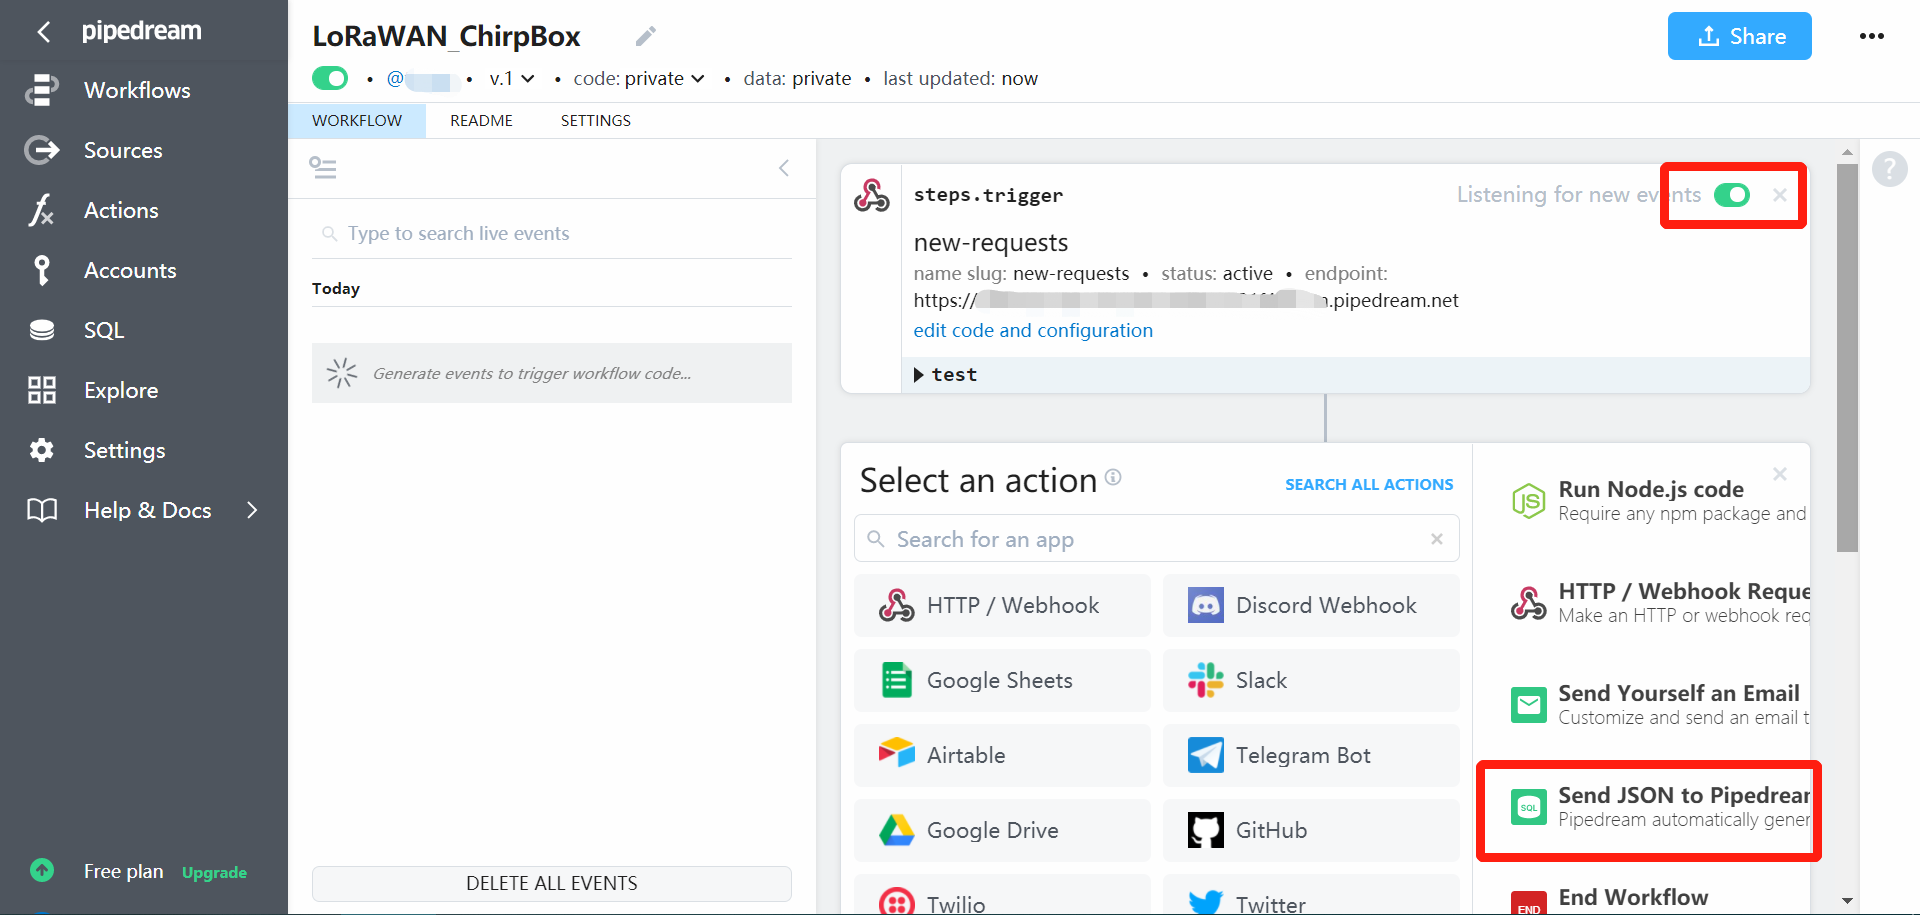
- Turn on for listening new events, and then create a new action as
Send JSON to Pipedream SQL Service
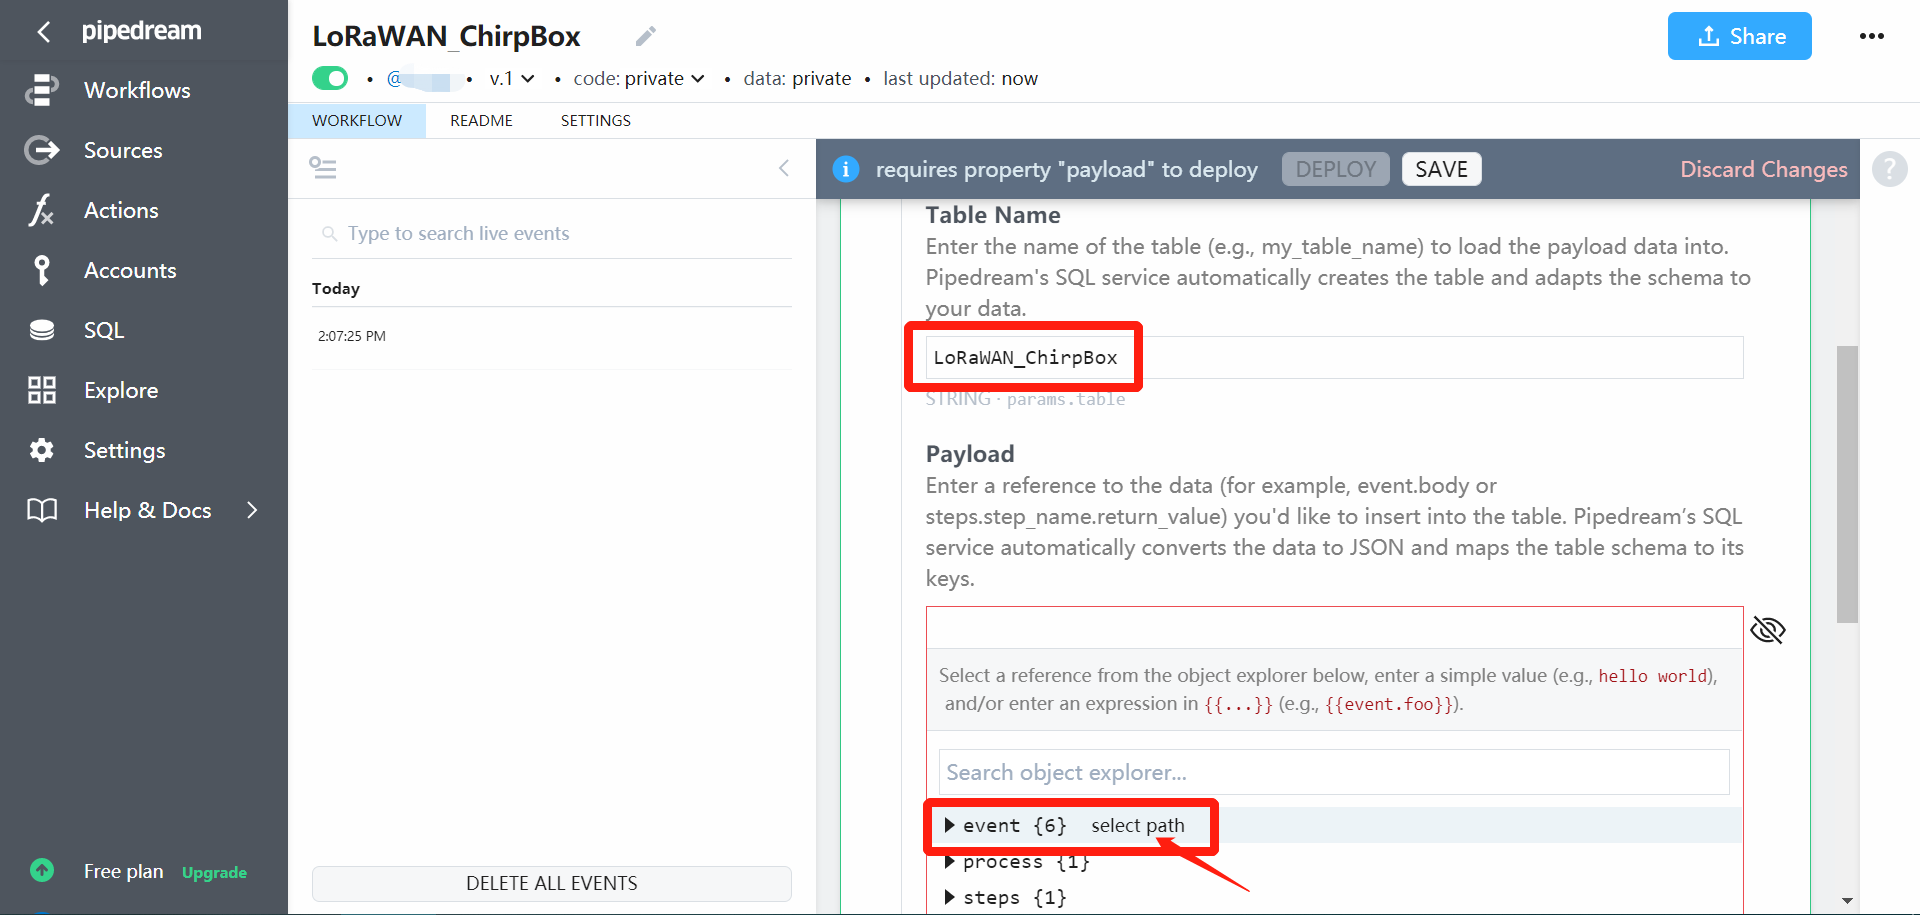
- Input a
Table Nameand select path of{{event}}asPayload:
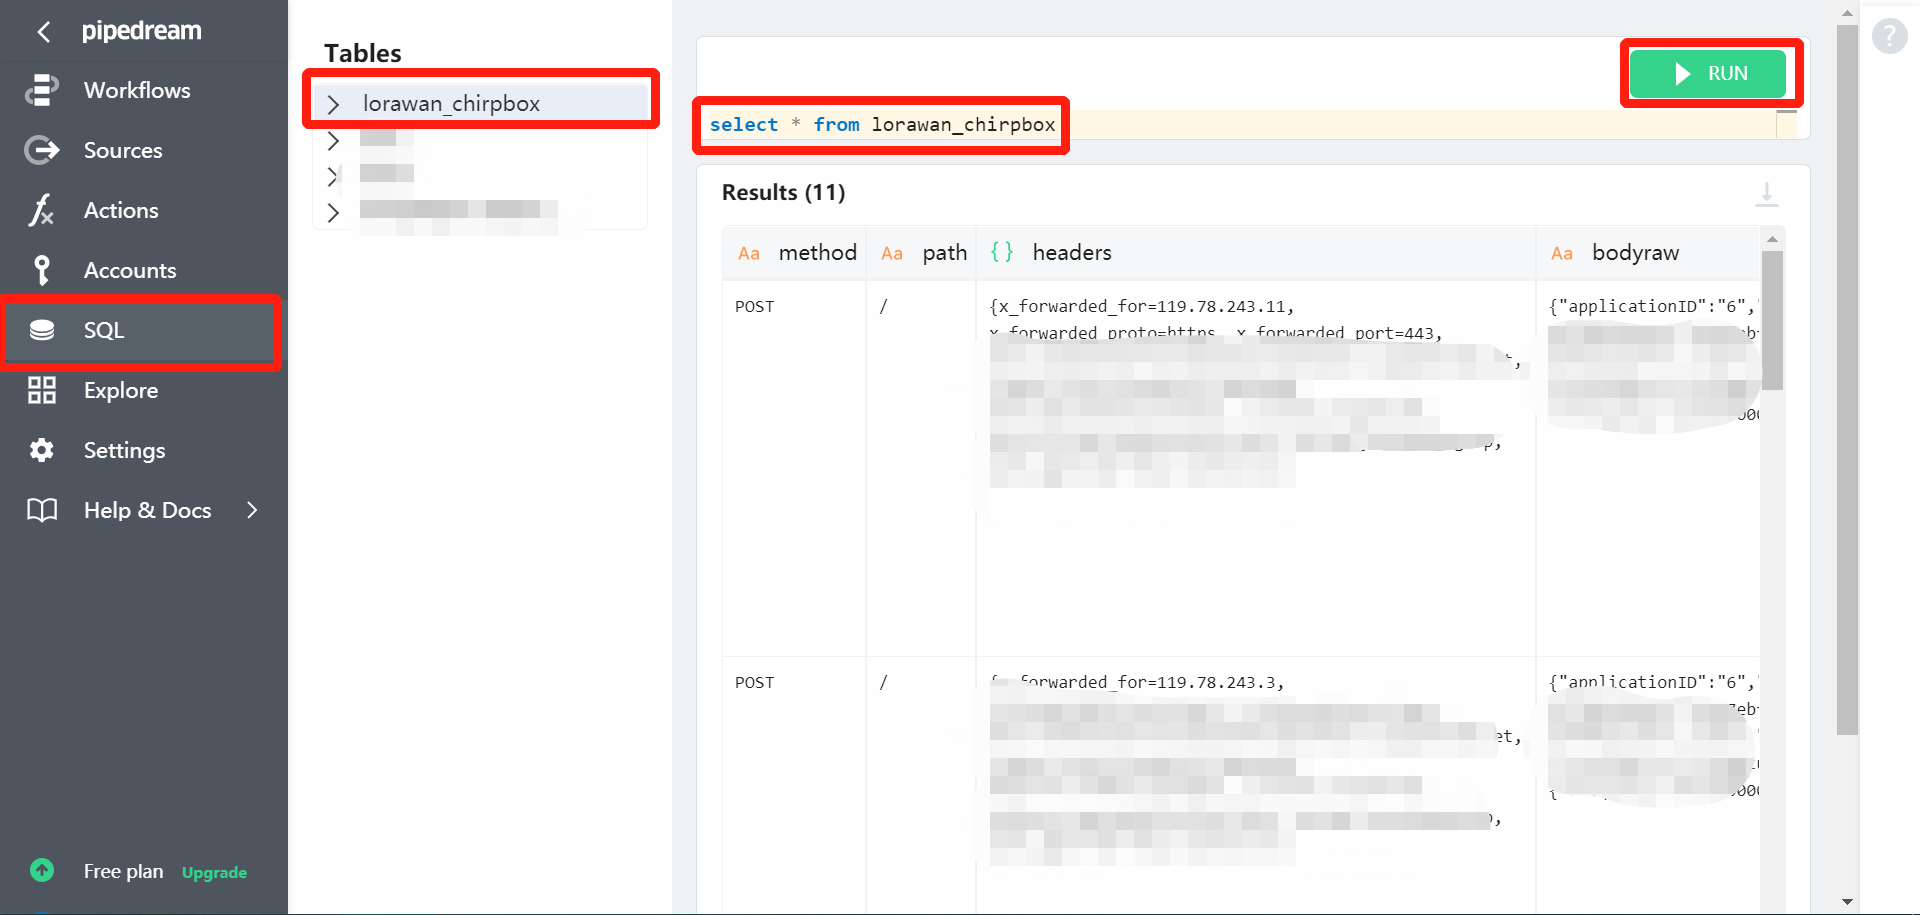
- Select SQL and run
select * from lorawan_chirpboxto query data (there is a 60-second delay of SQL for events):
3.3.2 Code examples
Pipedream provides APIs to retrieve events from source and SQL. Code examples are written in cURL, which can be converted to Python here.
1. Live events
- Obtain Pipedream API key here
- Get summary events and refresh them with commands
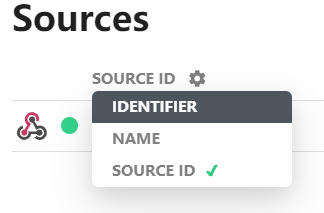
- Check
source_idclick setting:
- Note: packet payload are encoded as base64 strings, see online decode tool.